


114
Utility
Stitches
Characters
and
Decorative
Stitches
Embroidering
Editing
Embroidery
Patterns
Retrieving
My
Custom
Stitch
TM
Maintenance
Error
Messages
Trouble
shooting
Sewing
Chart
Patterns
(Programmed
in Machine)
Patterns
(Memory
Card)
Sewing
Setting Up
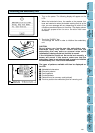
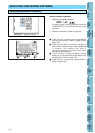
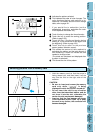
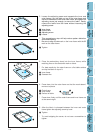
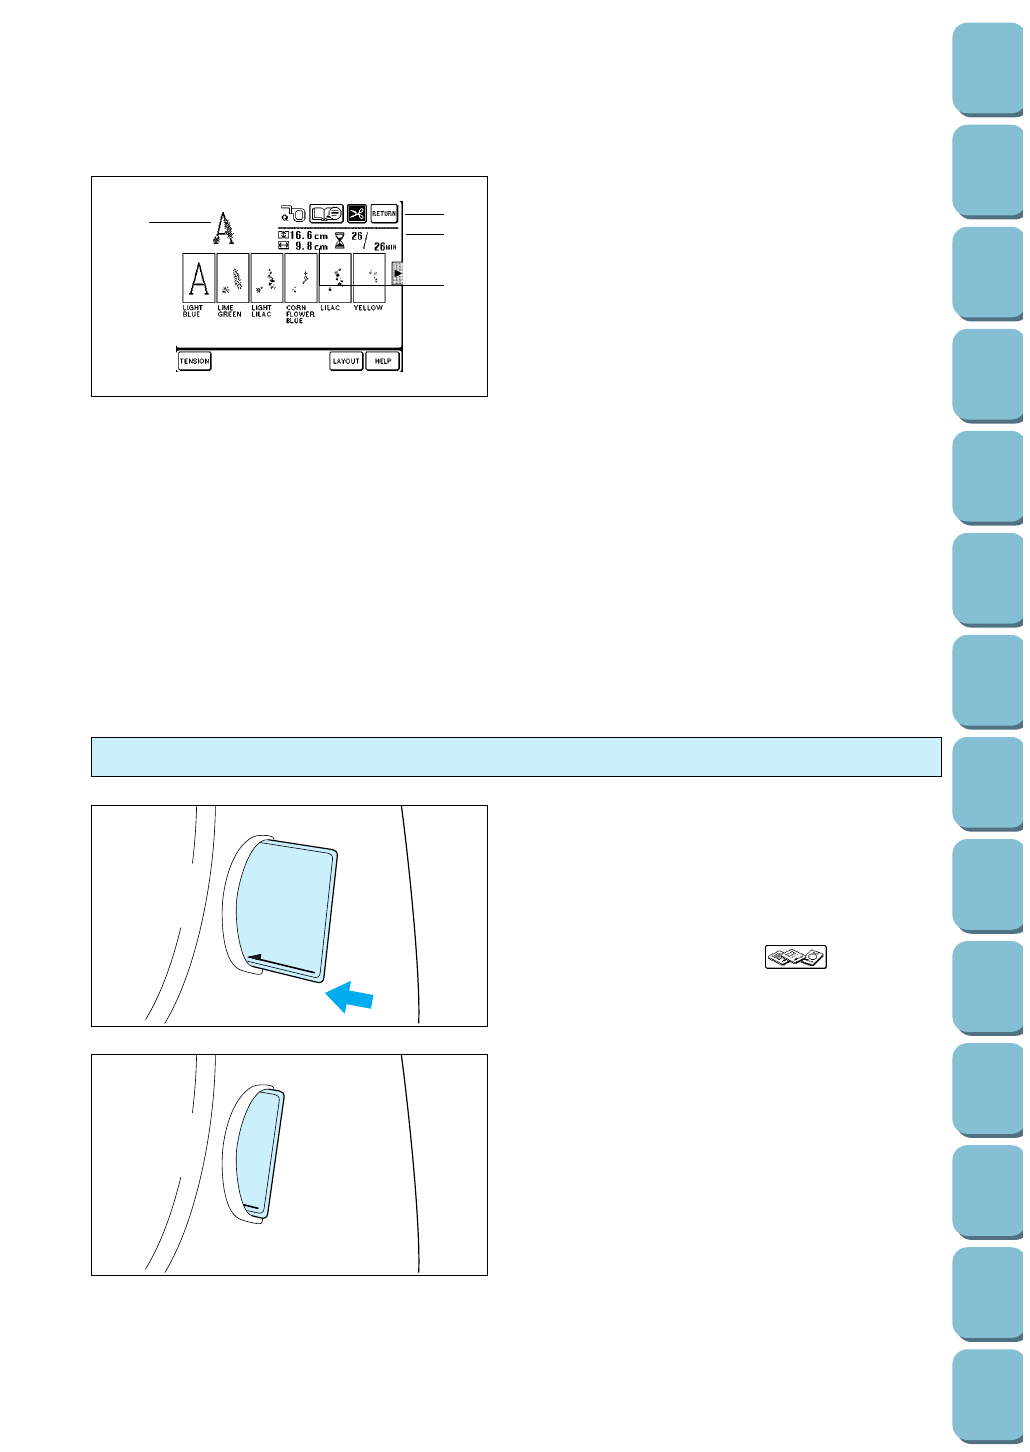
1 Indicates the pattern selected.
2 This indicates the order of color changes. The
color displayed below each pattern is for
reference. For details about the color change
table, refer to page 191.
* If you would like to embroider just the
alphabetical characters, embroider the color
of the alphabet characters only.
3 Touch this key to change the thread tension.
4 Touch this key to move the sewing position.
(Refer to page 123.)
5 Touch this key if the thread breaks during
sewing or if you would like to sew again from
the beginning. (Refer to page 129.)
6 Touch this key to return to the previous
screen (pattern selection screen).
7 This shows the amount of time required to
embroider the pattern and the total amount of
time remaining. It does not include the time
needed to change colors.
(The totals are calculated and displayed after
a pattern is selected.)
8 This shows the size of the pattern.
1
2
34
5
6
7
8
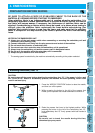
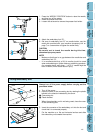
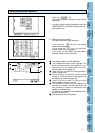
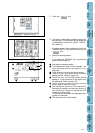
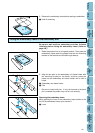
1. Hold the memory card so that the arrow is
facing toward you, and then insert it all the
way into the slot on the right side of the
machine.
CAUTION
– Be sure to insert and remove the memory
card only while “ ” is being
displayed or while the power is turned off.
– Do not insert the card in any direction
other than that described above, and do
not force it into the slot, otherwise the
card or the slot may become damaged.
– Insert so that the card appears as shown
in the illustration at left. If you try to push
the card in any further, the connector will
become damaged.
Selecting patterns from a memory card