106
Utility
Stitches
Characters
and
Decorative
Stitches
Embroidering
Editing
Embroidery
Patterns
Retrieving
My
Custom
Stitch
TM
Maintenance
Error
Messages
Trouble
shooting
Sewing
Chart
Patterns
(Programmed
in Machine)
Patterns
(Memory
Card)
Sewing
Setting Up
PREPARATION BEFORE SEWING
Q
4. EMBROIDERING
BE SURE TO ATTACH A PIECE OF STABILIZER FABRIC TO THE BACK OF THE
MATERIAL BY IRONING BEFORE STARTING TO EMBROIDER
Using stabilizer fabric is an indispensable part of creating attractive embroidery. It is
particularly important to attach stabilizer fabric to the back of stretch fabrics, thin fabrics
and fabric with coarse weaves. If necessary, two thicknesses of stabilizer fabric can be
attached. If embroidering on fabrics which cannot be ironed, or in places where ironing is
difficult, place the stabilizer fabric underneath the frame before embroidering. Use
stabilizer fabric which is larger in area than the frame, and make sure that the stabilizer
fabric is clamped all the way around by the frame to prevent the fabric from becoming
loose.
NOTES ON THE EMBROIDERY UNIT
(1) Always turn off the main power switch when connecting or removing the embroidery unit and
embroidery card (memory card).
(2) Connect embroidery unit firmly into the plug connector and socket of the machine.
(3) Do not touch the connector of embroidery unit.
(4) You cannot use a foot controller when the embroidery unit is operational.
(5) Always keep the embroidery unit and the memory card in designated cases.
(6) Do not carry the machine while the embroidery unit is connected.
(7) Always set your machine on a level surface.
* The sewing speed is controlled by the machine automatically according to the pattern selected.
5
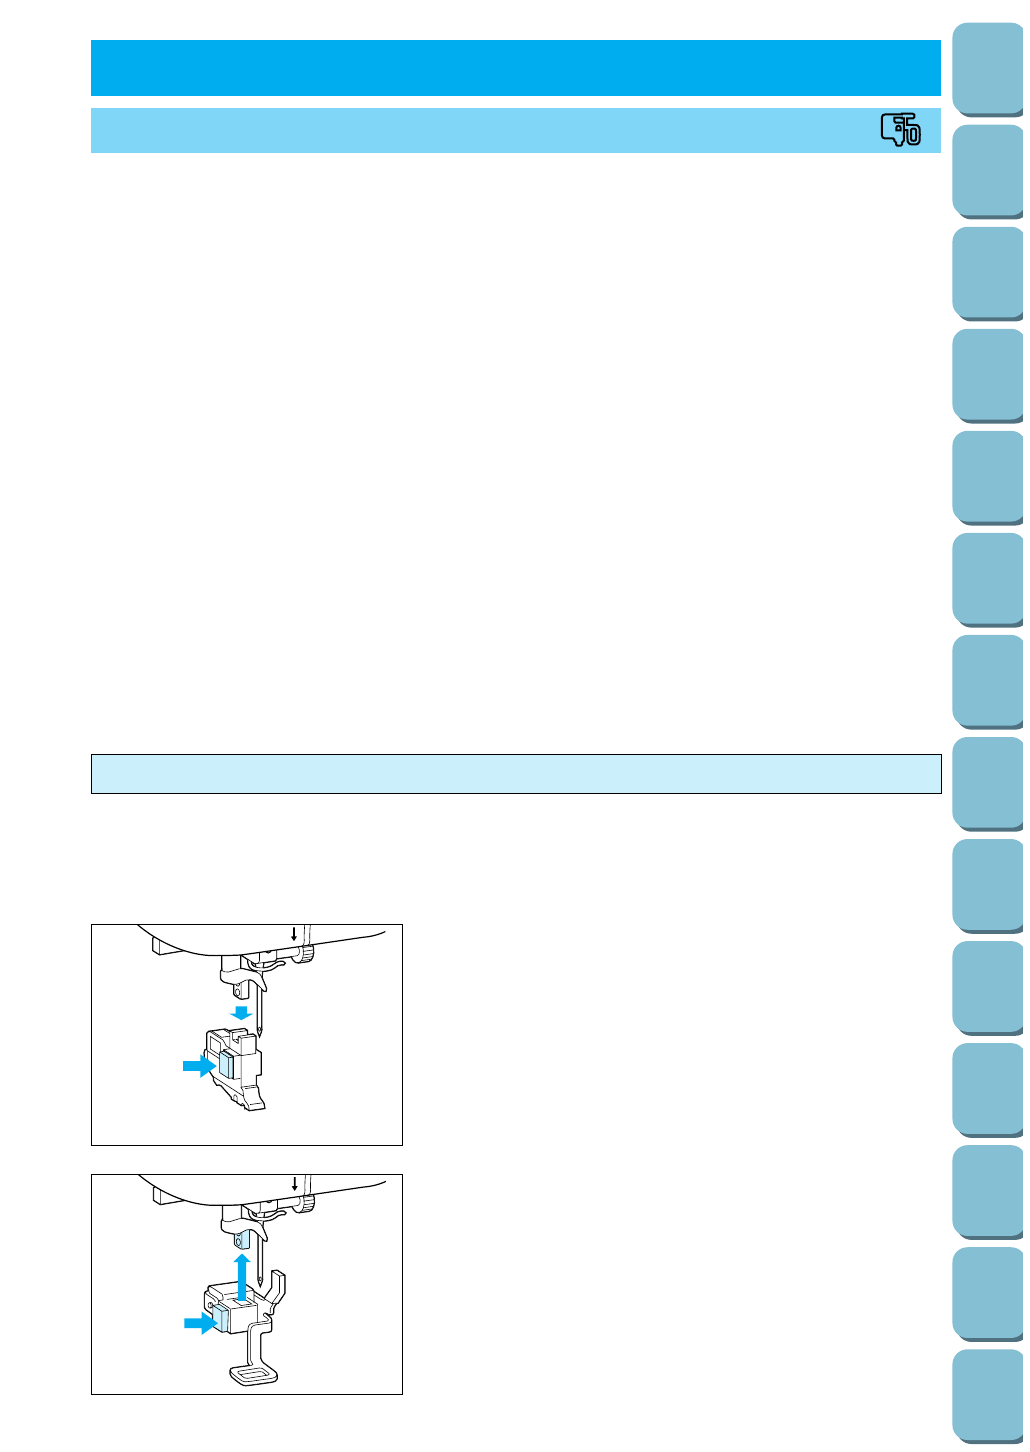
1. Press the “NEEDLE POSITION” button to raise the needle,
and then turn off the power.
2. While pressing the button to the left of the presser foot
holder, pull the presser foot holder downward to remove it.
5
3. Raise the presser foot lever to the highest position. While
pressing the button to the left of the embroidery foot “Q”,
push embroidery foot “Q” firmly upward with both hands to
install it.
CAUTION
Be careful not to touch the needle during this time,
otherwise injury may result.
Attaching embroidery foot “Q”
CAUTION
Be sure to turn off the power before attaching the embroidery foot “Q”. If the power is left on and
the “START/STOP” button is accidentally pressed, the machine will start operating, which could
result in serious injury.


