


Configuration
3–2 975-0704-01-01 Revision A
Configuration Steps
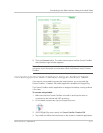
To complete Conext ComBox setup, you must successfully complete the
procedures in Chapter 2, “Installation”. Make sure the Conext ComBox is
connected, the Power LED is on, and the Status LED is off. Your Xanbus devices
should still be in standby mode.
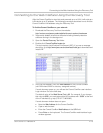
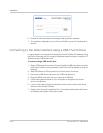
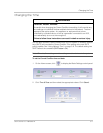
When you log in to the web interface, most of the setup information appears
automatically with their default values. Some information requires change (such
as passwords), some information can be modified as needed, and some
information can only be modified by a qualified IT professional.
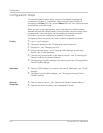
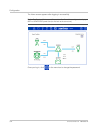
The following items are part of the Conext ComBox configuration process:
Primary
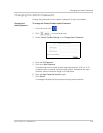
p Log in - see “Logging In”
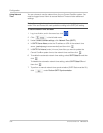
p Change the password - see “Changing the Admin Password”
p Set the time - see “Changing the Time”
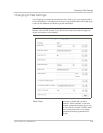
p Enter e-mail information - see “Changing E-Mail Settings” and sending
reports - see “E-mail Reporting”
p Connect the Conext ComBox to the Xanbus network - see “Connecting the
Conext ComBox to the Xanbus Network”
p Configure basic ComBox settings in the control panel- see “Changing Basic
Conext ComBox Settings”
Secondary
p Change TCP/IP settings if you want to use static IP addresses - see “TCP/IP
Settings”
p Configure Conext ComBox settings - see “Changing Advanced Conext
ComBox Settings”
Optional/
Occasional
p Clear the device memory - see “Clearing the Internal Firmware Memory”
p Upgrade the device firmware - see “Upgrading Firmware”