


152
Repairing the Pump
Exchanging the Leak Sensor
Exchanging the Leak Sensor
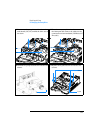
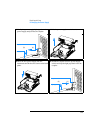
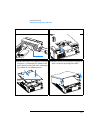
1 Switch off the pump at the main power switch, remove all cables and tubings,
remove the pump from the stack.
2 Remove the top covers and foam, see “Removing the Top Cover and Foam” on
page 128.
3 Remove pump assembly, fan, damper and the bottom foam, see “Exchanging
the Power Supply” on page 147.
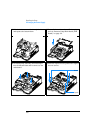
4 Remove the main board, see “Exchanging the Low Pressure Pump Main Board
(LPM Board)” on page 131.
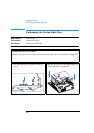
5 Unclip the leak pan and place it in front of the instrument.
6 Pull the leak sensor out of the leak pan and push the leak sensor cable and
connector through the metal plate.
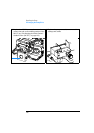
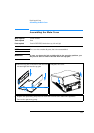
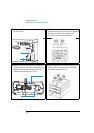
7 Push the connector of the new sensor through the metal plate.
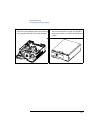
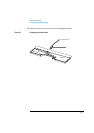
8 Place the leak sensor into the leak pan, see Figure 23 and clip the pan back
into its position.
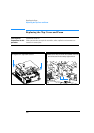
9 Reinstall the bottom foam. Make sure that the leak sensor cable is not covered
by the foam.
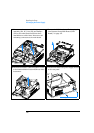
10 Replace the main board, see “Exchanging the Low Pressure Pump Main Board
(LPM Board)” on page 131.
11 Install the pump assembly, the fan, the damper and the Z-panel, see
“Exchanging the Power Supply” on page 147. Reconnect all cables and
capillaries.
12 Replace top foam and top cover, see “Replacing the Top Cover and Foam” on
page 156.
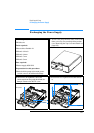
When required Leak messages without leak in the leak pan
Tools required Screwdriver Pozidriv #1
Wrench 1/4 inch
Wrench 14 mm
Wrench 7 mm
Wrench 5 mm
Parts required Leak sensor 5061-3356