


Instruction 24-94486-8
Maintenance
6.4 Sensor Only Replacement
All sensors are replaced in a similar manner. Do the following to
replace either the O2, CO-LO, CO-HI, NO, NO2, or SO2 sensor. Refer
to Section 8.1 Replacement Parts for list of sensors and part numbers.
Turn OFF the analyzer.
Remove the battery cover.
Remove the sensor retainer.
Remove the tubing from the gas cup of sensor being replaced.
Unplug the sensor along with its printed circuit board from the analyz-
er’s main board.
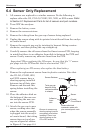
Remove the sensor’s gas cup by twisting its bayonet fitting counter-
clockwise, and then pulling the cup straight up.
Carefully remove the old sensor from the Smart sensor PCB, keeping
in mind that there is an adhesive foam disk in between the PCB and
sensor. Gently remove any adhesive from from the PCB.
Important! When replacing the O2 sensor, be sure that the “+” sensor
pin plugs into the PCB socket that is also marked “O2+”.
When replacing an NO sensor, also replace the bias battery.
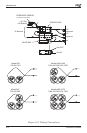
9. Remove the replacement sensor from its plastic canister. Note that
the CO-LO, CO-HI, SO2,
and NO2 sensors have a
shorting-spring installed
between two of their pins.
Remove and discard this
spring before installing the
sensor.
10. Place the adhesive disk on
the bottom of the new sen-
sor and plug the new sen-
sor into the sensor PCB.
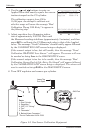
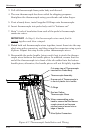
11. Attach the gas cup to new
sensor, making sure that
when the sensor assembly
is plugged into the analyz-
er’s main board, the tubing
connections on top of gas
cup are aligned as shown
in Figure 6-3 on page 6-4.
1.
2.
3.
4.
5.
6.
7.
8.
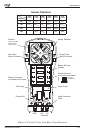
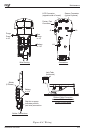
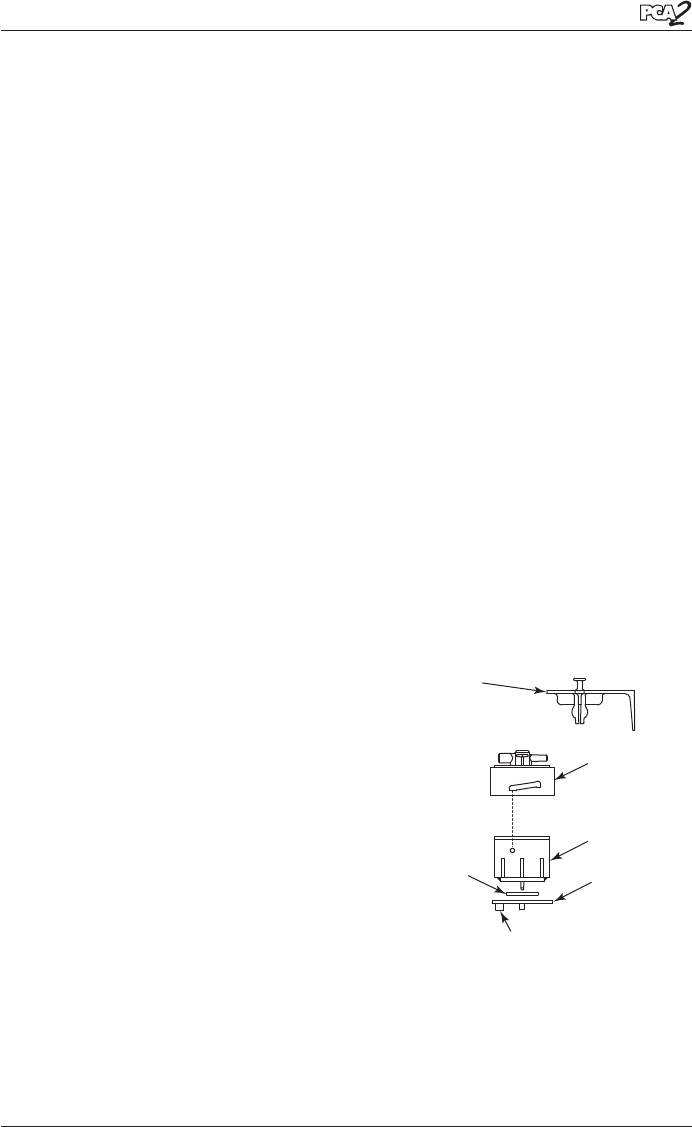
Gas Cup
Sensor Retainer
Sensor
Twist gas cap
bayonet fitting
counterclockwise
to release
Sensor electrical
connector mates with
pins on analyzer’s main
board
Printed
Circuit Board
Adhesive
foam
disk
Be sure to remove any
shorting spring from the
new sensor pins before
installing! There is no
shorting spring on the
O2 or NO sensors.