


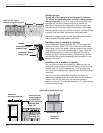
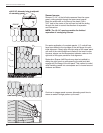
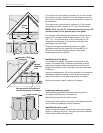
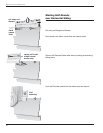

Installing under a window or opening
Install Restoration Shapes undersill trim. Cut the panel to fit
under the window. Drill a 3/16" hole in the center of the nail
hem. Using a snap lock punch, raise tab faces on the outside
of the panel 1/4" from the trimmed edge, 6" apart. Lock the
panel into the previous course, and center nail the siding
through the 3/16" hole drilled earlier. (Center nailing controls
the direction of the panel’s expansion and contraction.) Lock
the panel into place.
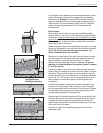
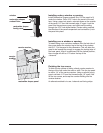
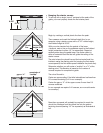
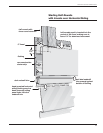
Installing over a window or opening
To install siding over a window, measure from the lock tab of
the course below the window top to the top of the window.
Add 3/4". Cut the panel to this dimension. This will allow the
panel to be lowered far enough to engage the locking tabs of
the lower panel. After it is positioned into the locked position,
the cut edge will still be 1/4" below the top of the
J-channel.
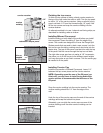
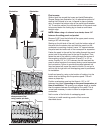
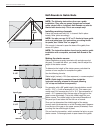
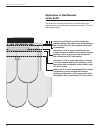
Finishing the top course
To finish the top course of siding, attach cornice receiver to
the top of the wall under the eave or soffit. Trim the top panel
to within 1/4" of the cornice receiver. Using a nail slot punch,
punch nail slots 1/4" from the trimmed edge, 16" apart. Nail
off the top course, and snap the cornice molding into the
cornice receiver.
An alternate method is to use J-channel and furring strips.
cornice receiver
1/4"
1/4"
restoration shapes panel
cornice
molding
window
restoration shapes
undersill trim
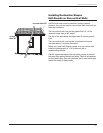
restoration shapes
family panel
87
Wolverine Fit and Finish Installation Guide