


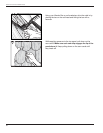


Installing TrueComfort
TrueComfort
™
insulated siding will help even out wall surfaces.
However, to minimize extremes in the peaks and valleys of
uneven walls, you may have to repair the underlayment. Make
sure the substrate is smooth and flat. If the surface is
significantly uneven, apply 1/4" foam sheathing before
installing TrueComfort siding.
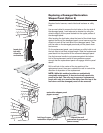
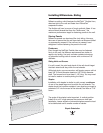
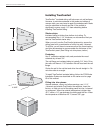
Starter strips
Insulated siding is thicker than hollow vinyl siding. To
accommodate the 1-1/4" thickness, we recommend that you
use the TrueComfort starter strip.
When you can’t use the TrueComfort starter strip, secure the
siding panel with a combination of utility trim and J-channel.
To do this, you will have to remove some of the foam backing
and shim accessories to accommodate the thickness of the
TrueComfort panel. (See Fitting into trim pieces, below.)
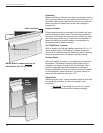
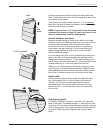
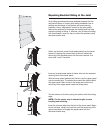
Fastening
Use 2" corrosion-resistant nails, and penetrate the wood
substrate by at least 3/4".
The nail flange on insulated siding is typically 3/4" thick. Drive
the nails until there is 1/16" between the nail head and the nail
flange.
Center the nail in the nail slot and drive the nail straight in. Do
not drive nails at an angle.
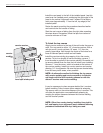
To install TrueComfort insulated siding, follow the STUDfinder
Installation System as described on the carton and on page
60 of this manual.
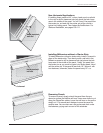
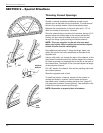
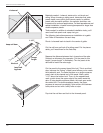
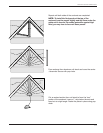
Fitting into trim pieces
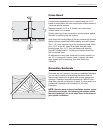
Around windows, doors, and other openings, use 1-1/4"
J-channel and outside TrueComfort cornerposts. Insert the
factory- or field-cut end of the siding panel into the J-channel
or cornerpost. When the outside temperature is higher than
40° F, allow a 1/4" gap between the siding and the trim. When
the temperature is less than 40° F, leave a 3/8" gap.
106
Wolverine Fit and Finish Installation Guide
3"
1-1/4"