


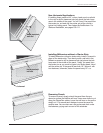


Materials needed: J-channel, starter strip, coil stock and
siding. When choosing a siding panel, remember that wider
panels install more quickly than narrow panels. In addition,
panels with decorative profiles – for example, dutchlap – are
impractical for sunburst applications. For best appearance and
easiest installation, choose from single exposure or larger face
double exposure panels.
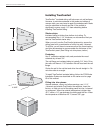
Tools needed: In addition to standard installation tools, you’ll
need a nail hole punch and a pop rivet gun.
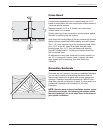
The following instructions assume an installation at a gable
end. Refer to illustrations for each step.
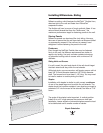
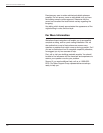
Plumb J-channels back-to-back in the center of gable.
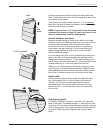
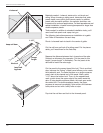
Cut the nail hem and lock off a siding panel. Put the pieces
aside; you’ll need them for the final step.
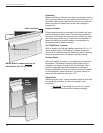
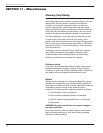
Measure the distance between the J-channel and the rake.
Subtract an allowance for expansion. Cut the panel to this
length (“proper length” in illustration). Trim the panel at the
rake end to match the rake angle.
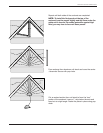
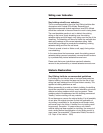
Cut the panel to the correct taper (third cut). This is a critical
step, because the “flaring” of each panel allows you to create
the sunburst’s arch. To create the taper on a single exposure
panel, start at the channel end of the panel. Mark a point
1-1/2" above the bottom butt. Then, on the opposite end,
mark a point where the upper edge of the panel meets the
rake. (If using double exposure panels, the mark goes under
the center butt. On double exposure panels, the upper
exposure is removed completely.) Now scribe a line between
both points and cut with a utility knife or snips.
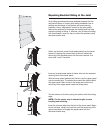
Pop-rivet the nail hem and lock to the trimmed panel.
110
Wolverine Fit and Finish Installation Guide
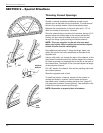
J-channel
keep nail hem
1-1/2"
proper
length
third cut
keep butt
leg area