


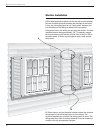
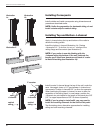
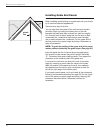

Installing Gable End Panels
When installing vertical siding on a gable end wall, you should
try to create a balanced appearance.
There are two ways to do this:
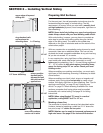
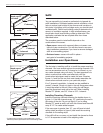
You can start from the center of the wall and work toward
the sides. Begin by finding the center point of the wall
(beneath the peak) and draw a plumb line. Nail two lengths
of J-channel, back to back, along this line. Be sure to flash
underneath the J-channel to help prevent water damage
due to water between the J-channels. Cut the upper end of
the first panel to the proper height and slope. Remember to
allow for expansion.
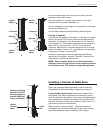
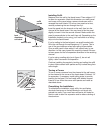
NOTE: To guide the cutting of the upper end of the panel,
make a pattern duplicating the gable slope. (See page 61.)
Insert the panel into the J-channel along the gable slope.
Use a level to make certain the panel is plumb. Nail every
12". Continue cutting and installing panels. Then repeat the
procedure on the remaining half of the gable end.
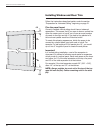
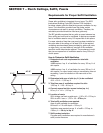
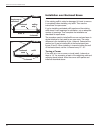
If you want to work from one end of the wall to the other,
begin by centering a panel under the center of the peak.
Mark the position of the panel on the wall, then measure
the distance from the left (or right) cornerpost to mark for
the left (or right) edge of the center panel.
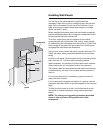
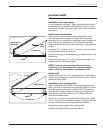
If you need a partial panel, cut it and install at the cornerpost,
following the procedure described on page 69. Cut the upper
end of the panels to proper height and slope, following the
procedure described above. Remember to allow for
expansion.
70
Wolverine Fit and Finish Installation Guide
plumb
line