


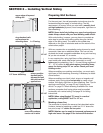
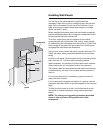


Remodeling Projects
Check to be sure the existing ceiling can serve as a solid
nailing base. If the existing ceiling is solid, remove all existing
moldings and fixtures from ceiling and begin by nailing
inverted J-channels along the perimeter of the ceiling area.
If you plan to use light blocks to attach external light fixtures,
install them to adequate backing.
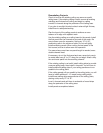
Plan the layout of the ceiling panels to achieve an even
balance or to align with adjacent work.
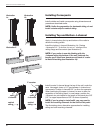
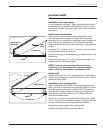
Use the existing ceiling as a nailing base for the panels. Install
the first panel into the channels at one end of the porch. Be
sure to leave room for expansion. Nail every 12" to 16",
positioning nails in the centers of slots. Do not nail tightly.
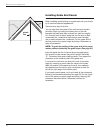
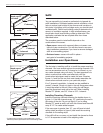
Install remaining panels. When cutting the last panel of the
first course, be sure to allow room for expansion.
For areas where more than one panel length is needed, use a
double channel lineal.
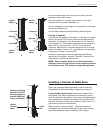
If necessary, rip cut the final panel and use a snap lock punch
to create tabs every 8" to 10" along the cut edge. Attach utility
trim and insert panel into the receiving channel.
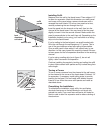
If the existing ceiling is not solid, install nailing strips to provide
a secure nailing base, then install J-channels. You will have to
install additional nailing strips if your ceiling panels are to run
parallel to the ceiling joists.
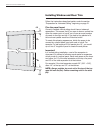
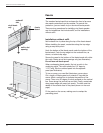
If the ceiling panels will run parallel to the ceiling joists, you will
have to install additional 1 x 3 wood furring nailing strips.
Install these nailing strips perpendicular to the ceiling joists,
placing a strip every 12" to 16".
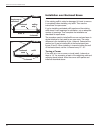
Invert J-channels and nail them to underside of wood strips
along the perimeter of the ceiling area.
Install panels as explained above.
73
Wolverine Fit and Finish Installation Guide