


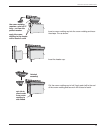

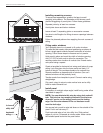
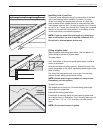
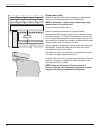
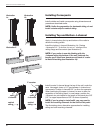

Installing trim at roof line
To prevent water infiltration along the intersection of roof and
wall, install flashing before installing J-channel. At points
where vinyl siding and accessories will meet at a roof line –
such as areas where a gable dormer or a second-story side
wall intersect with the roof – it’s best to position the J-channel
so it’s 3/4" to 1" away from the roof line. Placing the J-channel
directly on the roof line would subject it to a buildup of heat,
which could result in excessive expansion.
NOTE: If you use more than one length of J-channel to
span a wall surface, be sure to overlap J-channels 3/4".
Do not butt J-channel pieces end-to-end.
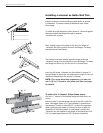
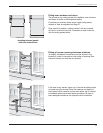
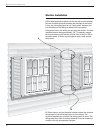
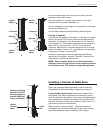
Fitting at gable ends
Make a pattern duplicating gable slope. Use this pattern to
guide cutting of panels to fit gable ends.
To make pattern:
Lock short piece of siding into panel gable starter course as
shown in illustration.
Hold second piece of siding against J-channel at slope. Run
pencil along edge of this piece, transferring slope angle to first
piece of siding.
Cut along line using power saw or tin snips. Use resulting
pattern to mark siding panels before cutting.
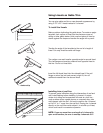
NOTE: Double-check angle on pattern at every course.
If necessary, cut new pattern.
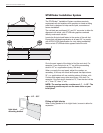
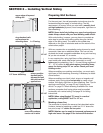
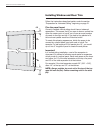
To install cut panels:
Slip angled end of panel into J-channel along gable edge.
Leave space for expansion.
Interlock with siding panel below.
If necessary to securely fasten the last panel at gable peak,
face nail as shown in illustration. This is the only place you will
face nail. Use 1-1/4" to 1-1/2" aluminum nail with painted
head.
NOTE: Do not cover louvers in gables.
colored
aluminum
nail finish
3/4"-1"
61
Wolverine Fit and Finish Installation Guide