


UNT-IOM-6 25
Connecting the
Condensate Drain
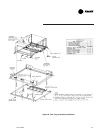
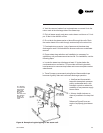
The auxiliary drain pan ships loose with a fan-coil unit with factory
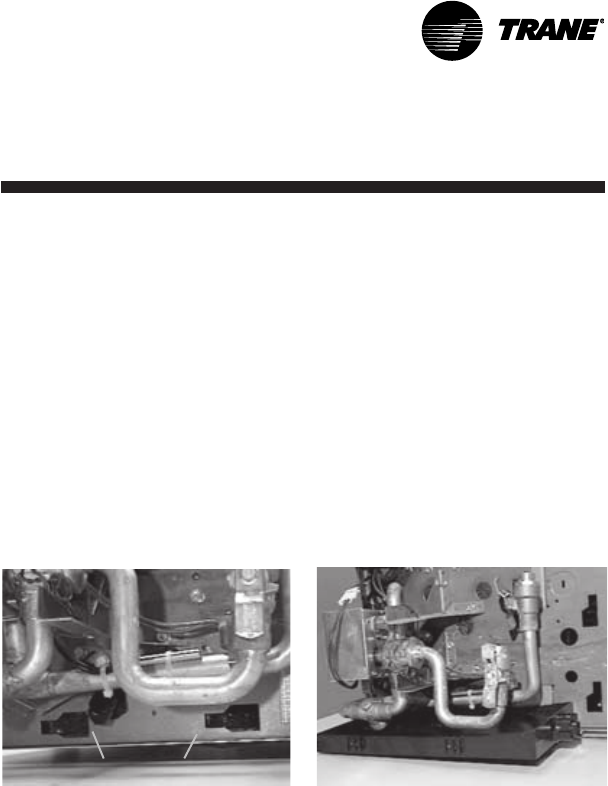
piping. To install the auxiliary drain pan, insert the tabs, located on
the side of the drain pan, into the slots located in the chassis end
panel. Slide the pan into the narrow groove section to lock into place.
See Figures 10 and 11. Make sure the auxiliary pan is pushed all the
way into the fully locked position.
Note: The function of the auxiliary drain pan is to collect condensate
from the main drain pan and the factory installed piping package only.
It also provides a convenient field connection for the condensate
drain line for units without factory piping. Moreover, the auxiliary drain
pan may not be adequate to collect condensate from a field-installed
piping package. Apply additional insulation as needed.
Installing the
Auxiliary Drain
Pan
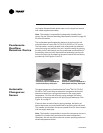
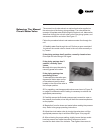
Figure 10. Insert the auxiliary
drain pan tabs into these slots
in the fan-coil chassis end
panel.
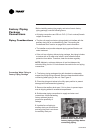
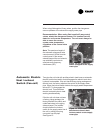
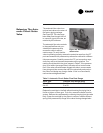
Figure 11. The horizontal
auxiliary drain pan in its
installed position.
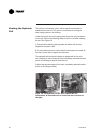
1. De-burr the pipe end before making the connection to the drain pan.
2. Connect a 7/8 inch O.D. copper pipe or tube, with a 0.20 inch wall
thickness, to the auxiliary drain pan. This should be a mechanical
connection that allows easy removal of the auxiliary drain pan when
servicing the piping end pocket.
3. Slide the copper pipe over the drain pan nipple and tighten the
collar on the pipe with a hose clamp (installer supplied).
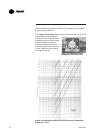
Maintain a continuous drain line pitch of 1 inch per 10 feet of drain line
run to provide adequate condensate drainage. Extend the drain line
straight from the drain pan a minimum distance of 6 inches before
making any turns. The installer must provide proper support for the
drain line to prevent undue stress on the auxiliary drain pan.
Install a secondary overflow drain line if necessary by punching out
the overflow drain nipple on the auxiliary drain pan. Next, place a 3/8