


69
●
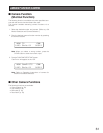
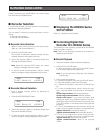
Manual Recording
1.
Select the recorder. (Refer to p. 67 Recorder Selection.)
2. Press the REC button. Recording will start.
3. To stop the recording, hold down the REC button for 2
seconds.
Note: Refer to the Operating Instructions of recorder
for details and other recording modes.
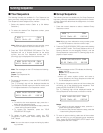
●
Marking
1.
Select the recorder. (Refer to p. 67 Recorder Selection.)
2. Press the PLAY/PAUSE button.
To start the playback, press the PLAY/PAUSE button.
The recorded image will be played back.
Note: If you have performed Recorder Auto Selection
in p.
67
, skip this step.
3. Press the MARK button during the playback. The play-
back start point will be marked.
Note: The marked playback images will be listed in the
marking list window. Refer to p.
73
Marking search
for how to play back.
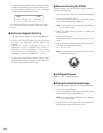
■
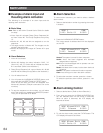
Search Playback
You can search recorded images through the date and time.
Every time you press the SEARCH/T&D SEARCH button, the
monitor display will change as follows.
Live image → Date-and-time entry form → Recording event
list → VMD search list → Marking list → Date-and-time
entry form…
The following are the details on LCD display patterns and
function buttons.
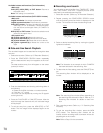
LCD display while the event list is displayed on the monitor
LCD display while the thumbnail menu is displayed on
the monitor
Note: While holding down the SHIFT button, the LCD dis-
play will become as follows.
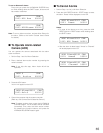
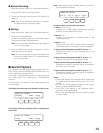
Available buttons and functions (Common)
F1 button: Thumb or List
Changes the monitor display between the recording
event list window and thumbnail menu.
F3 button: Text
Displays text information of selected event on the
recording event list.
F4 button: Copy
Displays the DATA COPY window while the recording
event, VMD search, or making list window is displayed.
F1 button while holding down the SHIFT button: Nr-A
Specifies the normal or event recording area for the
playback media.
F2 button while holding down the SHIFT button: Cp-A
Specifies the copy area for the playback media.
F3 button while holding down the SHIFT button: Cpy1
Specifies the external recording device connected to
the COPY1 port of recorder.
F4 button while holding down the SHIFT button: Cpy2
Specifies the external recording device connected to
the COPY2 port of recorder.
Notes:
• The monitor display is not changed even if pressing the
F1 button while the date-and-time entry form is dis-
played.
• To close the monitor display activated by the function
buttons, press the MON (ESC) button.
• The DATA COPY window is not displayed while a
thumbnail window is displayed.
• Refer to the operating instructions of recorder for details
on each function.
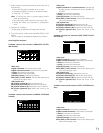
Search Mode /HD300
Thumb Text Copy
F1 F2 F3 F4
Search Mode /HD300
List Text Copy
F1 F2 F3 F4
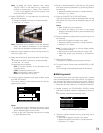
Search Mode /HD300
Nr-A Cp-A Cpy1 Cpy2
F1 F2 F3 F4