


92
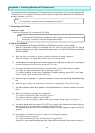
11) Formatting will start. When formatting is complete, copying of files from CD-ROM to hard disk
begins. When all the files have been copied, the computer automatically restarts. Immediately
before restarting, remove the floppy disk from drive A and the CD-ROM from the CD-ROM drive.
After the computer restarts, Setup will continue.
12) The Windows XP Setup Wizard starts. First, device installation is automatically performed.
13) The “Regional Settings” screen appears. Click “Next>”.
14) The “Personalize Your Software” screen appears. Enter your Name and Organization and click
“Next>”.
15) The “Your Product Key” screen appears. Enter your Product Key and click “Next>”.
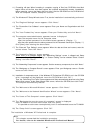
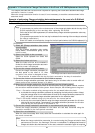
16) The computer name/administrator password screen is displayed.
Input the computer name for the Computer name.
Input the optional password for the Administrator password. (Display: ***)
Input the same password as the above password for the Password check/input. (Display: ***)
Click [Next] after entering the above items.
17) The “Date and Time Settings” screen appears. When the date and time are incorrect, enter the
correct values. Then click “Next>”.
18) The “Networking Settings” screen appears.
(When there is no network adapter, the “Networking Settings” screen is skipped and Setup
advances to Step 23).) “Typical Setting” or “Custom Setting” can be selected. Select “Custom
Setting” and click “Next>”.
19) The “Networking Components” screen appears. Set the necessary components, then click “Next>”.
20) The “Workgroup or Computer Domain” screen appears. Enter your Workgroup name or Domain
name and click “Next>”.
21) Installation of components starts. (If the Windows XP Professional CD-ROM is not in the CD-ROM
drive, a message will be displayed. Insert the CD-ROM and click “OK”.)
Then, the “Performing Final Tasks” screen appears and Setup automatically advances to the Setup
Wizard finish screen. At the Setup Wizard finish screen, remove the CD-ROM, then click “Finish”.
The computer automatically restarts.
22) The “Welcome to Microsoft Windows” screen appears. Click “Next>”.
23) The “Welcome to the Network Identification Wizard” screen appears. Click “Next>”.
24) The “Users of This Computer” screen appears. Click “Next>”.
25) The "Designate the user who uses this computer" screen is displayed.
Input TG-2000A for the user name used, and click [Next].
* It is possible to set the user name optionally, but it is recommended to use the TG-2000A.
26) The "Setup finish" screen appears. Click “OK”.
The installation of Windows XP Professional is complete.
Note:
This chapter summarized the installation procedure.
For details, refer to the attached Windows XP Professional Manual.