


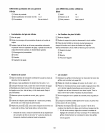

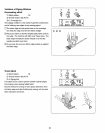
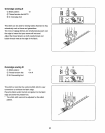

Auto-Lock Stitch
Stitch pattern: 10
Q Thread tension dial:AUTO
(_ A: Zigzag foot
@ H: Straight stitch foot
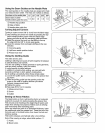
Lower the needle close to the front edge of the fabric and
lower the presser foot. The machine will sew several
locking stitches in place and continue sewing forward.
By pressing the reverse button, the machine will sew
several locking stitches in place, then stop sewing
automatica!ly..
Note:
When using the straight stitch foot, make sure to use
center needle position. Otherwise the needle may
strike the sewing foot and possibly break.
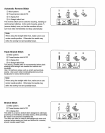
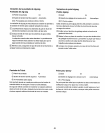
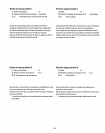
Saddle Stitch
O Stitch pattern: 30
(_ Thread tension dial:AUTO
(_ A: Zigzag foot
@ H: Straight stitch foot
This saddle stitch is formed with one stitch forward, two
stitches backward, and a fourth stitch forward.
You can achieve a lovely hand-worked look when
topstitching suits, blazers, jumpers, and denim outfits with
the saddle stitch.
Note=
When using the straight stitch foot, make sure to use
center needle position.. Otherwise the needle may
strike the sewing foot and possibly break.
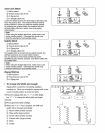
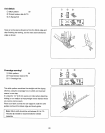
Zigzag Stitches
Q Stitch pattern: 04
(_ Thread tension dial:AUTO
A: Zigzag foot
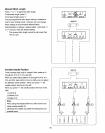
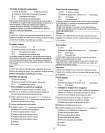
• To change the Width and Length
Zigzag stitch is useful for overcasting, applique,
mending etco When you change the zigzag width, make
sure the needle position isabove the fabric°
J_] Press the zigzag width key "+", "-" or stitch length
key "+", "-" to change the stitch width and length
manually.
[] Pre+programmed stitch settings.
[_ When the %" or "-" key is pressed, the width and
length will be changed accordingly1
G Narrow width (smaller number)
_) Wider width (large number)
_D Denser stitch (smaller number)
@ Coarser stitch (large number)
O Width
(_ Length
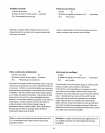
6) ® ® ®
olox % 'o,'"J
Io AUTO__
@) ® ® ®
II1 b"C -_,.,.-+_1
30 AUTO A_-_
@ ® ®
04 I::IUTO A"_ :'_ 5,02.0 •
_@@
@:)
],.-C5.0 m
04 UTO 2.0
WIDTH LENGTH
J
56