58
Adjust
19
20
21
22
23
24
26
27
28
29
30
31
R
25
A Z
Sensor BH
Pull down BH Lever
17
SEN
18
AUT
Auto
2
1
3
Sensor buttonholes
NOTES:
• Buttonholes 17 and 19 to 27 are sensor
buttonholes.
• The size of a buttonhole is automatically set
by placing a button in the rear of Automatic
Buttonhole Foot R.
• The button holder of the foot takes a button
size of 0.5 cm (3/16”) to 2.5 cm (1˝) in
diameter.
• It is sometimes necessary to change
buttonhole size to match certain heavy or
specific materials and threads.
• Make a test buttonhole on an extra piece of
the fabric to check your settings.
• Place the button on the fabric and mark the
top and bottom to determine the position of
the buttonhole on the fabric.
• Use interfacing on stretch fabrics.
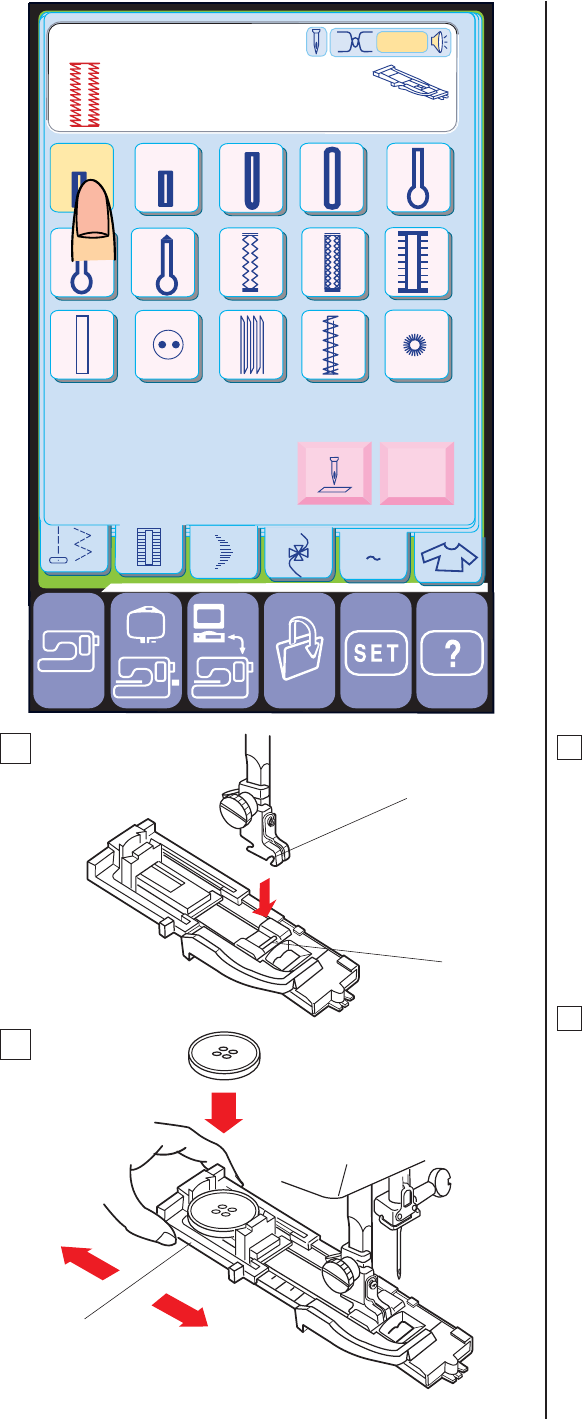
To sew
1Press the Up/Down Needle Button to raise
the needle. Attach the Automatic
Buttonhole Foot R snapping the Pin into
the Groove of the foot holder. Raise the
Presser Foot.
1
Pin
2
Groove
2 Pull the Button Holder to the back, and
place the button in it. Push it together
tightly on the button.
3
Button Holder
NOTE:
• If the button is extremely thick, make a
test buttonhole on an extra piece of the
fabric. If it is difficult to fit the button
through the test buttonhole, you can
lengthen the buttonhole by pulling the
Button Holder back a little. The length
of the buttonhole will be increased.
1
2


