117
4
1
( + )
( – )
( + )
( – )
( + )
( – )
4
4
3
2
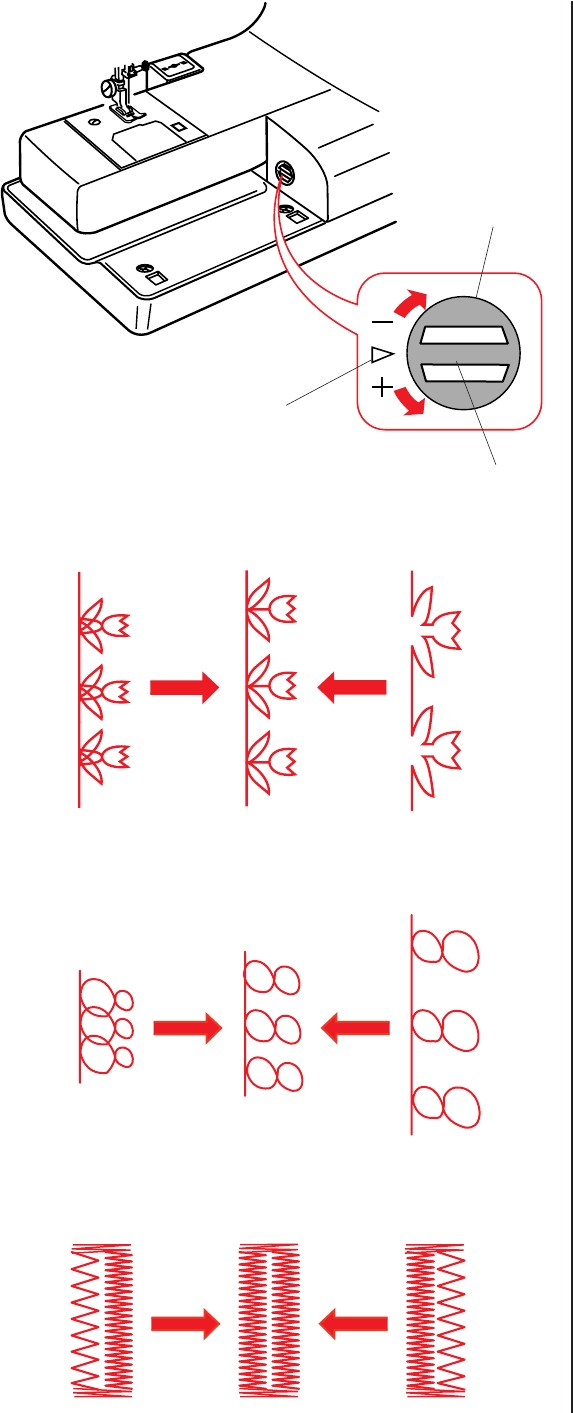
Correcting Distorted Stitch Patterns
The sewing results of the stretch stitch
patterns may vary depending upon the
sewing conditions, such as sewing speed,
type of the fabric, number of layers etc.
Always make test sewing on a scrap piece
of the fabric that you wish to use.
If decorative stitch patterns, letters,
numbers or the manual buttonhole stitch are
distorted, correct it with the Feed Balancing
Dial.
NOTES:
• In normal sewing, set the Feed Balancing
Dial to the neutral position, i.e. the
Groove on the Dial is centered with
the Standard Setting Mark
.
• Turn the Feed Balancing Dial with a coin.
1 Feed Balancing Dial
2 Groove on the Dial
3 Standard Setting Mark
Decorative stretch stitch patterns
• If the pattern is compressed, turn the dial
in the direction of “+”.
• If the pattern is drawn out, turn the dial in
the direction of “–”.
4 Correct Shape
Letters and numbers
• If the pattern is compressed, turn the dial
in the direction of “+”.
• If the pattern is drawn out, turn the dial in
the direction of “–”.
Correcting stitch balance of the Auto
Buttonhole
The stitch balance of the right and left rows
on the Auto Buttonhole may vary depending
on conditions of sewing. If the stitches are
not balanced, correct the unevenness with
the Feed Balancing Dial.
• If the right row is denser, turn the dial in
the direction of “+”.
• If the left row is denser, turn the dial in
the direction of “–”.
NOTE:
• Return the Feed Balancing Dial to its
neutral position when the sewing is
finished.


