


14 • Chapter 2 Getting Started DMC-1700/1800
Note: Galil software is also available for download at: http://www.galilmc.com/support/download.html
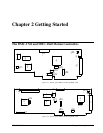
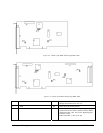
Step 4. Install the DMC-1700/1800 in the PC
The DMC-1700 is installed directly into the ISA expansion bus. The DMC-1800 is installed directly
into the PCI expansion bus. The procedures are outlined below.
Step A. Make sure the PC is in the power-off condition.
Step B. Remove unit cover.
Step C. Remove the metal plate covering the expansion bus slot where the DMC-1700/1800
will be inserted.
Step D. Insert DMC-1700/1800 card in the expansion bus and secure with screw.
Step E. Attach 100-pin cable to your controller card. If you are using a Galil ICM-1900 or
AMP-19X0, this cable connects into the J2 connection on the interconnect module. If
you are not using a Galil interconnect module, you will need to appropriately terminate
the cable to your system components, see the appendix for cable pin outs. The auxiliary
encoder connections are accessed through the 26-pin IDC connector, J5.
1X80
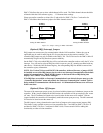
If you are using a controller with more than 4 axes you will need a CB-50-100 converter board, which
brings out a second 100-pin cable to be attached to the second ICM-1900. Two 50-pin ribbon cables
attach the CB-50-100 to the DMC-1780.
DMC-1700 Install:
The DMC-1700 is addressed manually, with a default address of 1000. Earlier controller revisions
(Rev. E and earlier for DMC-1740, Rev. C and earlier for DMC-1780) had Plug-and-Play utilities,
which have been removed on the most current revisions. Please refer to the appendix if your controller
has the Plug-and-Play functionality. If an address other than 1000 is necessary for your controller,
refer to Step-2.
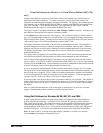
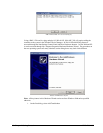
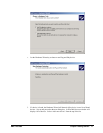
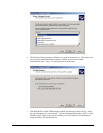
DMC-1800 Install:
The installation of the DMC-1800 will vary with operating systems due to how the PCI is handled
within that operating system. For Win98SE, ME, NT4.0, 2000 and XP, the OS will automatically
install the drivers. With Windows 95 or 98, upon power up your computer should recognize the DMC-
1800 as a new device and will prompt you for an “Installation Disk”. The computer will ask you to
point towards the DMC1800.INF file on your PC. This file will automatically configure the controller
for your computer’s available resources. The installation will also automatically add this information
to the Galil Registry (see Step 5 below).
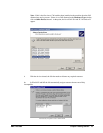
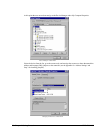
Step 5. Establishing Communication between the Galil controller
and the host PC
Using Galil Software for DOS (DMC-1700 only)
To communicate with the DMC-1700, type DMCTERM at the prompt. You will need to provide
information about your controller such as controller type (DMC-1700), address, and IRQ. Once you
have established communication, the terminal display should show a colon “:”. If you do not receive a
colon, press the carriage return.
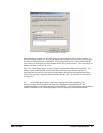
If you still do not receive a colon, the most likely cause is an address conflict in your computer. If the
default of address 1000 causes a conflict, Galil recommends the addresses of 816 and 824, since they
are likely to avoid conflict. Please refer to Step-2 Configuring the Address Jumpers on the DMC-1700
to change the address.