


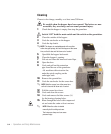

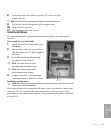


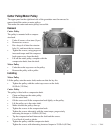

5 Install one rotating knife at a time
on the knife attachment on the rotor.
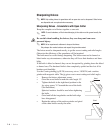
6 Install screws (A) with washers (B),
and tighten so that they hold
the knife lightly.
7 Press the knife firmly into the knife
attachment.
NOTE: The screws in the rear of the
knife attachment are bonded in place.
NOTE: The knife has a fixed position and no adjustment may be done.
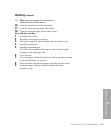
8 Tighten screws (A), with alternating tightening torque to 55.3 lb-ft (75 Nm).
NOTE: Granulators with open cutter – tighten the screws (A) with alternating
increased torque to 162.3 lb-ft (220 Nm).
9 Check that the rotating knife can pass the rear fixed knife freely.
If the knife can not pass freely – undo screws (A) and press the rotating
knife firmly into the knife attachment.
Undo screws (E) and press the fixed knife firmly into the knife attachment.
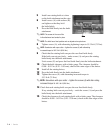
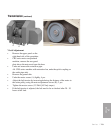
10 Check the knife clearance with a feeler gauge. The clearance should be
0.008 - 0.012 in. (0.20 - 0.30 mm), check at the outer edges of the knives.
11 Install all the rotating knives.
12 Press the knife firmly into the knife attachment.
13 Tighten the screws (A) with alternating increased torque to
55.3 lb-ft (75 Nm).
NOTE: Granulators with open cutter – tighten the screws (A) with alter-nating
increased torque to
162.3 lb-ft (220 Nm).
14 Check that each rotating knife can pass the rear fixed knife freely.
If any rotating knife can not pass freely – undo the screws (A) and press the
knife firmly into the knife attachment.
15 Check the clearance of each rotating knife with a feeler gauge The clearance
should be 0.008 - 0.012 in. (0.20 - 0.30 mm), check at the outer edges of the
knives.
A, B
✐
✐
✐
7-4 l Service
✐