– 128 –
RAV-SM561, 801CT-E
RAV-SM1101, 1401CT-E
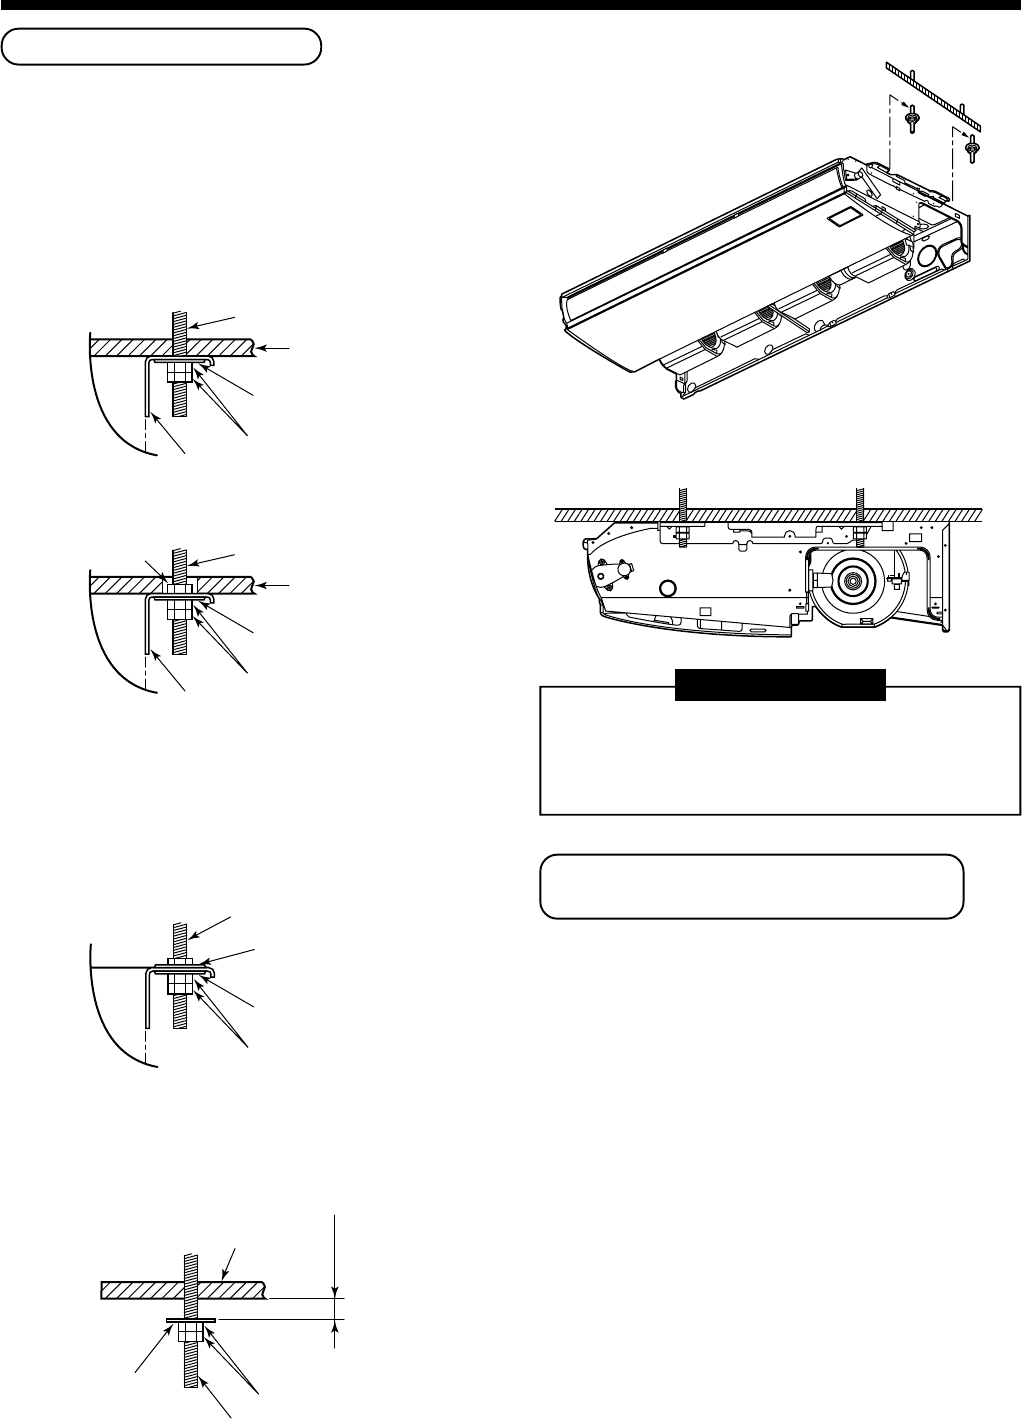
Installation of indoor unit
• Preparation before holding down main unit
* Confirm the presence of the ceiling material
beforehand because the fixing method of hanging
metal when the ceiling material is set differs from
that when the ceiling material is not set.
<There is ceiling material>
Hanging bolt
(Procured locally)
Nut
(Procured locally)
Indoor
unit
Ceiling surface
Double nut
(Procured locally)
Washer (Accessory)
Hanging
metal
Hanging
metal
Hanging bolt
(Procured locally)
Ceiling surface
Double nut
(Procured locally)
Washer (Accessory)
Indoor
unit
Indoor
unit
Hanging bolt
(Procured locally)
Double nut
(Procured locally)
Washer (Accessory)
Washer
(Procured locally)
Washer
(Accessory)
Ceiling surface
Hanging bolt
20 to 30
Double nut
(Procured locally)
* Tighten the hanging metal with upper/lower nuts
as shown in the figure.
<There is no ceiling material>
• Holding down of main unit
1) Attach washer and nuts to the hanging bolt.
2) Hang the unit to the hanging bolt as shown the
figure below.
3) As shown in the figure below, fix the ceiling material
securely with the double nuts.
REQUIREMENT
• The ceiling surface may not be
horizontal. Be sure to confirm that width
and depth directions are level.
Installation of remote controller
(Sold separately)
For installation of the wired remote controller, follow
the Installation Manual attached with the remote
controller.
• Pull out the remote controller cord together with the
refrigerant pipe or drain pipe.
Be sure to pass the remote controller cord through
upper side of the refrigerant pipe and drain pipe.
• Do not leave the remote controller at a place
exposed to the direct sunlight and near a stove.
• Operate the remote controller, confirm that the
indoor unit receives a signal surely, and then install
it. (Wireless type)
• Keep 1m or more from the devices such as
television, stereo, etc.
(Disturbance of image or noise may generate.)
(Wireless type)
2
SELECTION OF INSTALLATION PLACE


