


– 180 –
• After unpacking the unit, examine it carefully if there are possible damage.
• Do not install in a place that might increase the vibration of the unit.
• To avoid personal injury (with sharp edges), be careful when handling parts.
• Perform installation work properly according to the Installation Manual.
Inappropriate installation may result in water leakage, electric shock or fire.
• When the air conditioner is installed in a small room, provide appropriate measures to
ensure that the concentration of refrigerant leakage occur in the room does not exceed the
critical level.
• Install the air conditioner securely in a location where the base can sustain the weight
adequately.
• Perform the specified installation work to guard against an earthquake.
If the air conditioner is not installed appropriately, accidents may occur due to the falling unit.
• If refrigerant gas has leaked during the installation work, ventilate the room immediately.
If the leaked refrigerant gas comes in contact with fire, noxious gas may generate.
• After the installation work, confirm that refrigerant gas does not leak.
If refrigerant gas leaks into the room and flows near a fire source, such as a cooking range, noxious gas might
generate.
• Electrical work must be performed by a qualified electrician in accordance with the
Installation Manual. Make sure the air conditioner uses an exclusive power supply.
An insufficient power supply capacity or inappropriate installation may cause fire.
• Use the specified cables for wiring connect the terminals securely fix. To prevent external
forces applied to the terminals from affecting the terminals.
• Conform to the regulations of the local electric company when wiring the power supply.
Inappropriate grounding may cause electric shock.
• Do not install the air conditioner in a location subject to a risk of exposure to a combustible
gas.
If a combustible gas leaks, and stays around the unit, a fire may occur.
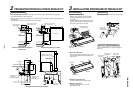
2
ELBOW PIPING KIT
CAUTIONS
• For details of installation work, refer to the Installation
Manual attached to the indoor unit.
• When installing this kit together with a drain up kit
(TCB-DP22CE), refer to the Installation Manual
attached to the drain up kit.
• Please preserve this Manual with the Owner’s
Manual of the indoor unit.
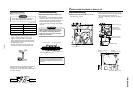
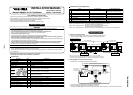
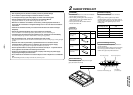
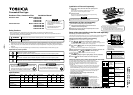
Parts List
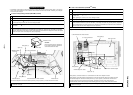
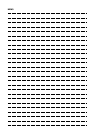
Before Installation
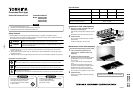
Before installation, open the draw port of the upper
pipes. (Sheeted knockout hole)
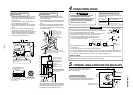
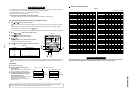
Connection of Pipes
• Be sure to use a double spanner to connect the
pipes.
• Using a torque wrench, tighten surely with the
specified tightening torque the connecting section of
flare pipes which connect each unit of the indoor and
outdoor units. For the tightening torque, see the
following table.
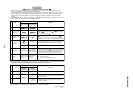
Outer dia. of
connecting pipe (mm)
Ø6.4
Ø9.5
Ø12.7
Ø15.9
Tightening torque
(N-m)
14 to 18 (1.4 to 1.8kgf-m)
14 to 18 (1.4 to 1.8kgf-m)
14 to 18 (1.4 to 1.8kgf-m)
14 to 18 (1.4 to 1.8kgf-m)
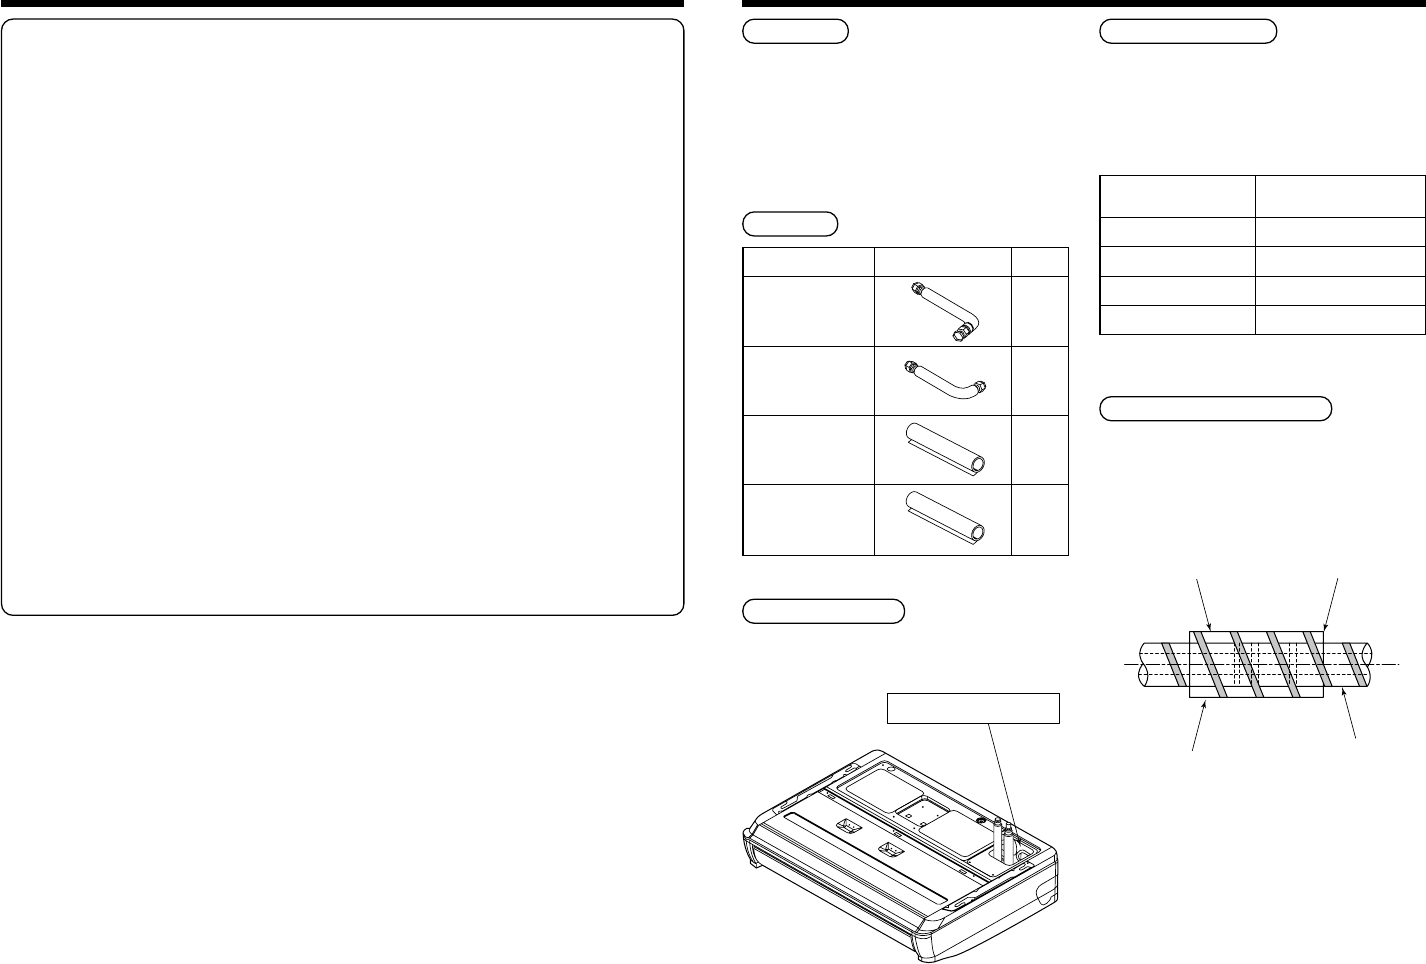
Thermal Insulating Process
• Apply thermal insulation to pipes at liquid side and
gas side separately.
• Using thermal insulators attached to this part and the
indoor unit, apply thermal insulation to connecting
section of the pipes surely without clearance.
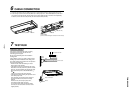
Draw port of the upper pipes
Fix it with vinyl tape. Set the notch upward.
Attached thermal insulating pipe
Side of pipe
procured locally
Name
Elbow type pipe
(Gas side)
Elbow type pipe
(Liquid side)
Pipe thermal insulator
(Gas side)
Pipe thermal insulator
(Liquid side)
Shape
Q’ty
1
1
1
1
RTCB-KP12CE
TCB-KP22CE