


C3663M-B (11/09) 47
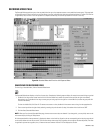
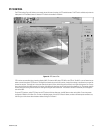
5. Use the mouse to draw a mask in the selected video pane. Motion must occur in the masked area for an image to be displayed during the
smart search. To clear a mask, click the Mask Color box and select Clear Mask; to reverse the mask, select Inverse Mask.
6. Adjust the Blocks Requiring Motion s
lider bar to select the number of “blocks” in the mask that must exhibit motion for an image to be
displayed during the smart search. Adjust the % Motion Required slider bar to select the pixel value (color) change that must occur in a
block for motion to be identified.
After the smart search is
configured, you can perform the search in one of the following ways:
• Next Frame: Th
is button displays the next image in the video clip that meets the smart search parameters.
• Play Frames: Th
is button sequentially displays all images that meet the smart search parameters.
• Build
Search List: This button compiles all images that meet the smart search parameters. When the search list is complete, the Play
Smart Search List option is activated, and the number of images in the clip that meet the smart search parameters is displayed.
While Play Smart Search List is selected, click the play button at the top of the screen. This plays back all images in the search lis
t.
Other smart search features include:
• You can cancel a smart search in prog
ress by clicking Cancel Search.
• You can zoom into a video pane selected for a smart search by selecting Zoom in the On Mouse Click area.
• You can select a new video pane for a smart search by selecting an option other than Smart Search, and then clicking the camera icon
on
the Search tab.
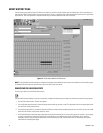
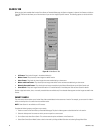
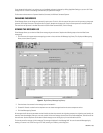
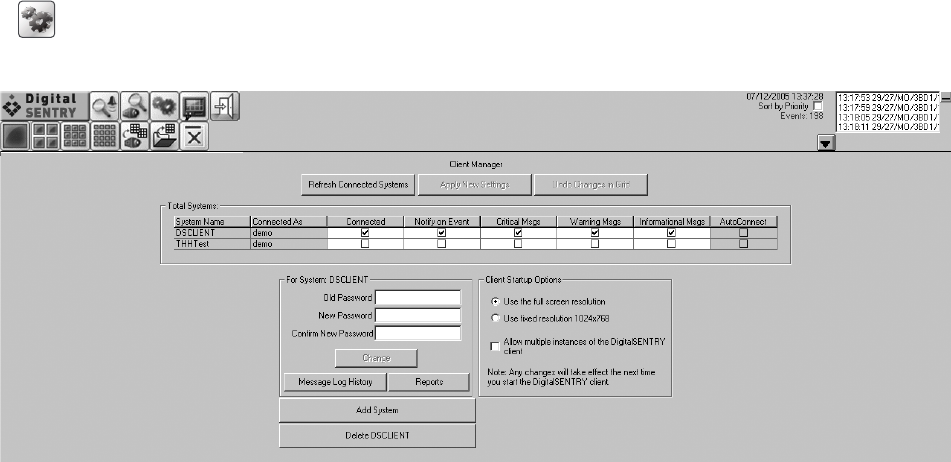
CLIENT MANAGER
Client Manager allows you to monitor the status of your connection to DS systems and control several operation parameters. Click the following
button to open Client Manager:
Figure 40. Client Manager Window
The following information is listed within the Client Manager (refer to Figure 40):
• System Name: The name of each configured server in the .INI file
• Connected As: The user name that connects you to the system
• Connected: If selected, you are currently connected to the system
• Notify On Event: If sele
cted, you will be notified when an event occurs on the system
• Critical Msgs: If selected, you will be notified when critical messages occur on the system
• Warning Msgs: If selected, you will be notified when warning messages occur on the system
• Informational Msgs:
If selected, you will be notified when informational messages occur on the system
• Auto Connect: If selected, Auto Connect is currently turned on for the system
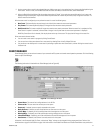
Information in the Connected, Notify On Even
t, and the three “Msgs” columns can be changed with the proper permissions. Refer to User
Administration o
n page 24 and DSAdmin on page 10 for information on the Disable Error Monitor and Disable Event Monitor user permissions.