


C3663M-B (11/09) 37
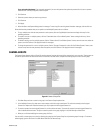
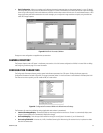
VIDEO PANE CONFIGURATION
The following video pane configuration buttons control the display of live video:
The 1 × 1 button displays video from a single camera.
The 2 × 2 button displays video from up to four cameras.
The 3 × 3 button displays video from up to nine cameras.
The 4 × 4 button displays video from up to 16 cameras.
The Camera Groups button displays video from predefined groups of cameras.
The Save Local Camera Group button allows you to create camera groups spanning multiple DS systems and to create camera
sequences.
The Close Windows button removes all live video panes (or any other graphics, such as the Event History or Recorded Video time
lines).
To view live video, click a video pane configuration button. If you click the 1 × 1 button, the first camera configured for the first connected system
is displayed; if you click the 2 × 2 button, the first four cameras are displayed; and so forth.
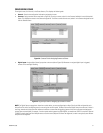
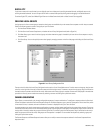
To view a camera group configured in DSAdmin, click the Camera Groups button to display a tree diagram of connected servers. Expa
nd the tree
to view camera groups, and then either double-click the group or click the View Group button. All cameras in the group are then displayed in a
multiple-pane format. For information on creating camera groups, refer to DSAdmin on page 10.
To change which cameras are displayed in which video panes, refer to Cameras Tab on
page 40.
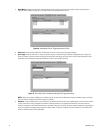
RECORDING MODE INDICATORS
Live video panes displaying video that is currently being recorded are surrounded by colored bars that indicate the current recording mode (time-
lapse, motion, or alarm). The colors are based on settings entered on the Event History and Recorded Video pages. Refer to Event History Page on
page 42 and Recorded Video Page on page 44 for information on configuring recording mode color indicators.
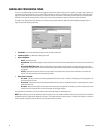
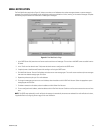
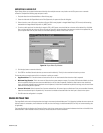
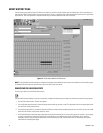
Figure 33. Quick View of Recorded Video
QUICK REVIEW
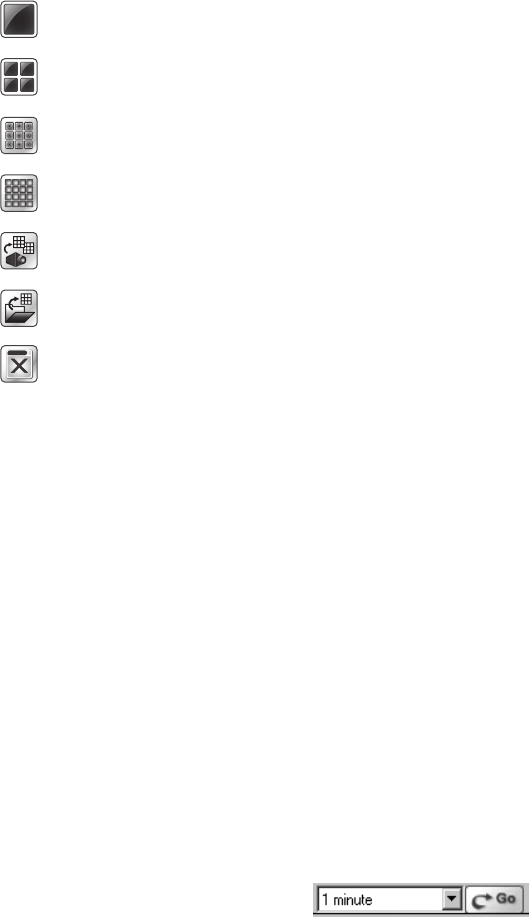
The Go button above the video panes (refer to Figure 33) allows you to quickly view recently recorded video. Use the drop-down arrow to select
video from the previous 1, 5, 15, 30, or 60 minutes. When you click Go
, video from the selected time frame is displayed for each currently
selected camera. You can scroll through the video using the slider on the time line at the top of the screen.
To view video from a time frame before the previous 60 minutes, perform a search on the Event History or Recorded Video page (refer to Event
History Page on page 42 and Recorded Video Page on page 44).
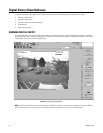
ZOOMING INTO VIDEO
To zoom into a video pane, left-click the pane to highlight it. Each additional click increases the size of the video in the pane by a factor of two
(cropped to fit the video pane) and re-centers the pane in the direction of the click. Right-clicking reverses the zoom.