


C3663M-B (11/09) 29
If you selected either button: Enter the user’s password. If you want this password to replace the password for this user on systems
where the user is already configured, select this option.
2. Click Continue.
3. Select the systems where you wa
nt to copy the user.
4. Click Continue.
5. Click Apply.
6. Watch the Status and Systems dialog boxes for messages. To save a log file containing these information messages, click the dis
k icon.
Other administration procedures that you can perform on the Multiple Systems tab are as follows:
•To copy
multiple users with the same password to other systems, click the Copy Multiple Users button and begin with step 2 of the
preceding procedure.
•To create a new user on multiple systems, click the “Create New User on One or More Systems” button and begin with step 1 of the
preceding procedure.
•To de
lete an existing user from multiple systems, click the “Delete a User On One Or More Systems” button, enter the user name, select the
systems, and click Continue. Click Apply and watch for messages.
•To cha
nge the password for a user on multiple systems, click the “Change a Password for a User On One Or More Systems” button, enter
the user name, enter the new password, select the systems, and click Continue. Click Apply and watch for messages.
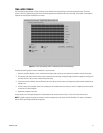
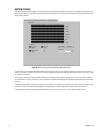
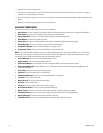
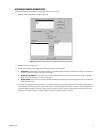
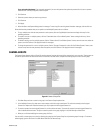
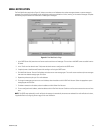
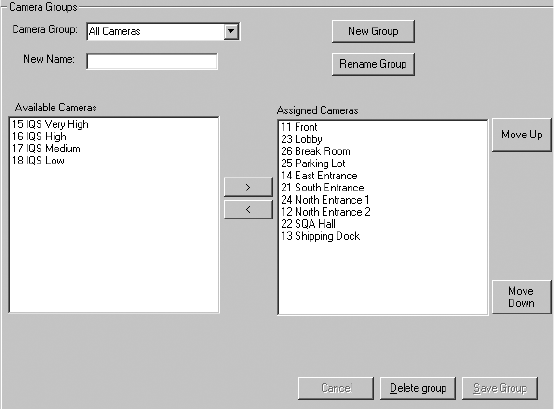
Figure 22. Camera Groups Tab
CAMERA GROUPS
The Camera Groups directory (refer to Figure 22) contains groups of cameras with some similar characteristic, such as location. These groups can
be used for quick selection of cameras from which to view live or recorded video. Complete the following steps to create a camera group:
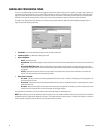
1. Click New Group and enter a name for the group in the Camera Group drop-down box.
2. In the Available Cameras list, select one or more cameras and click the right arrow button. This adds the camera(s) to the Assi
gned
Cameras list. Repeat until all desired cameras (up to 16) are placed in the Assigned Cameras list.
3. To remove a camera from the Assigned Came
ras list, click the left arrow button. To remove all cameras from the Assigned Cameras list,
click the double left arrow button. To adjust a camera's position in the group, highlight it and click Move Up or Move Down.
4. When you are finished modifying the camera group, click Save.
You can modify a camera group at any time by selecting the group from the Camera Group list and performing steps 2 through 4. To re
name a
selected group, type the new name in the New Name field and click Rename Group.