


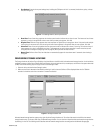
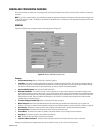

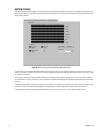
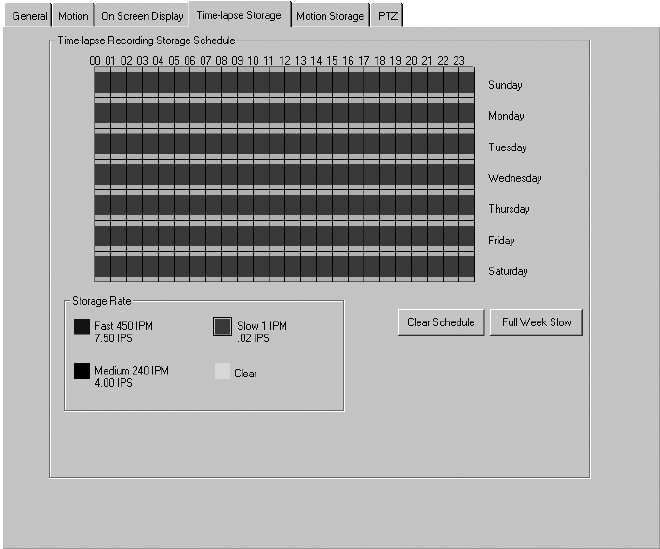
Figure 13. Time-Lapse Storage Tab for Scheduling Continuous Recordings
C3663M-B (11/09) 21
TIME-LAPSE STORAGE
The Time-lapse Storage tab (refer to Figure 13) allows you to schedule time-lapse recording for the currently selected camera. The screen
contains a time line, organized by day and time, that visually represents the schedule for each day of the week. The schedule is color-coded to
represent the recording rate scheduled for the camera.
Complete the following steps to create a schedule for a day of the week:
1. Select the rate (Slow, Medium, or Fast, as defined on the General tab) at which you want video to be recorded on that day of th
e week.
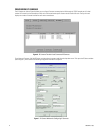
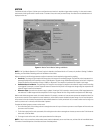
2. Click the day’s row under the time of day you want to start time-lapse recording, and drag the edge of the box that appears to th
e right until
you reach the time of day you want to stop time-lapse recording.
3. If you want to record at different rates at different times on that day of the week, select a recording rate and draw another s
chedule box on
that day’s row.
4. To clear a section of the schedule, select Clear and drag over the schedule boxes that you want to erase. To completely clear t
he schedule
to start over, click Clear Schedule.
5. Repeat this procedure for each day.
Changes saved on the Time-lapse Storage tab are implemented at the next time interval: 0 (zero), 15, 30, or 45 minutes after the hour.
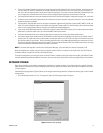
NOTE: To quickly configure the camera or cameras to record at the preset s
low rate, simply click Full Week Slow. This button is available on
both the Time-Lapse Storage and Motion Storage tabs.