Chapter 1 Working with HDV 19
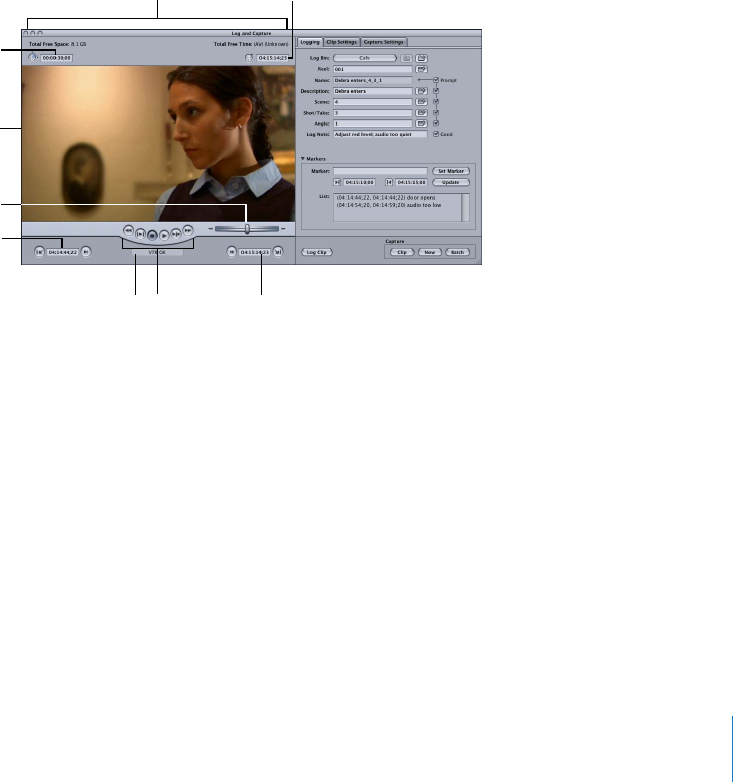
There are several areas in the Log and Capture window:
 Preview area: On the left is the area where you view video while logging clips. This
area contains transport controls, marking controls, and timecode fields. If device
control is not enabled, the transport controls do not appear.
 Tabs: On the right are the Logging, Clip Settings, and Capture Settings tabs.
 Log and capture buttons: You click one of these buttons when you are ready to log a
clip or capture media.
The resize control in the lower-right corner allows you to adjust the size of the Log and
Capture window. This option is available only when you select an HDV Easy Setup.
Preview Area
This section of the Log and Capture window lets you view video from tape while you
log and capture it. The video preview area remains black until your camcorder or deck
is turned on and a tape is playing in the device. The following controls appear if your
camcorder or deck is on and properly connected, and device control is enabled.
Important: If your computer has a PCI graphics card installed and you are logging or
capturing HDV footage, Final Cut Pro does not preview video or audio in the Log and
Capture window. You can still log and capture, but you need to use your HDV camcorder
display to preview video.
Clip In Point
Timecode field
Current Timecode
field
Clip Out Point
Timecode field
Timecode Duration field
Video preview area
Device
status
Shuttle control
Available space
and time
Transport
controls
