


112
Toshiba
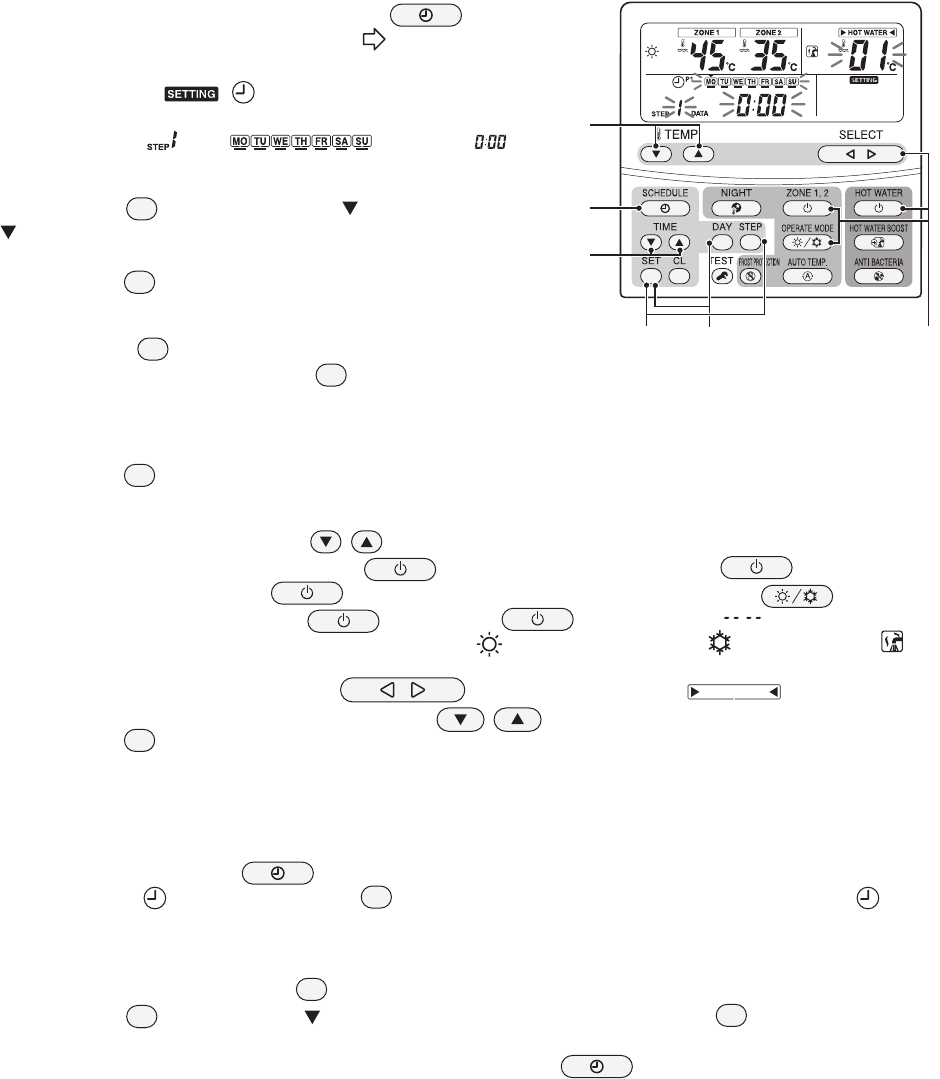
6. Scheduled Operation Setting
Schedule setting makes the following modes to be flexibly set: hot water supply, heating, cooling, hot water supply
and heating, hot water supply and cooling, and stop, and set temperature.
6-1. How to set scheduled operation
<Preparation>
Set the remote controller time.
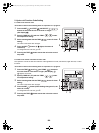
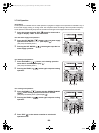
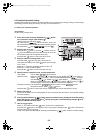
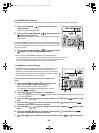
1 Press the remote controller SCHEDULE button
for 4 seconds or longer. (See display )
(Moves to the schedule setting mode)
The following blink: , , and P1 indications, items to be
set, the set temperature of ZONE1/2 and HOT WATER (previous
set temperature), day ( ), and time .
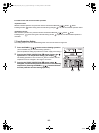
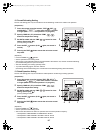
2 Specify a day to be set.
Press the DAY button to move day to the day to be set.
( moves by each button press from MO through SU. From SU,
the symbol moves to MO through SU (Every day).
Press the SET button to confirm the day to be set.
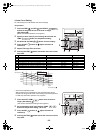
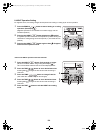
3 Specify a step from among steps 1 to 8.
Press the STEP button to specify a step to be set.
(The selection moves by each STEP button press among 1
to 8, C, and L.)
Selecting "C" copies the day details already set. Go to
7.
Selection "L" clears the setting details.
Press the SET button to confirm the step to be set.
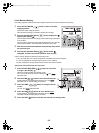
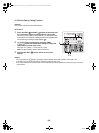
4 Specify set time, operation mode, and set temperature.
Time setting: Use the TIME button to set time.
Operation mode: Press HOT WATER for hot water supply, ZONE1,2 for heating, or
ZONE1,2 for cooling, and then press OPERATE MODE . Pressing
HOT WATER or ZONE1,2 again displays " ", indicating stop.
When an operation mode is set, " " appears for heating, " " for cooling, or " " for
hot water supply, and also the temperature set last time is displayed.
Temperature setting: Use the SELECT button to select a mode and set
temperature with the TEMP. button.
Press the SET button to confirm the set time, operation mode, and set temperature to be set.
5 Repeat 2 through 4.
(If only one schedule is set, the setting applies to all the time period after the set time. Two schedule settings
are recommended.)
6 Pressing the SCHEDULE button ends the schedule setting. Ending the schedule setting
blinks the light . Pressing the SET button during the 5-second blinking changes to lit,
and the schedule operation starts.
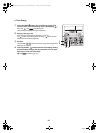
7 How to copy program
Select "C" in 3 and press the SET button. (Copy source is determined.)
Press the DAY button to move to the day of copy target. Pressing the SET button overwrites the
program setting to the copy target.
To set more, repeat step
2 through 4. Pressing the SCHEDULE button ends the schedule setting.
1,
6,
7
4
4
3,6,7 2,7 4
+00A09-002_01EN_SVM_ALL_Air_to_Water.book Page 112 Monday, October 5, 2009 2:09 PM