VISTA-40 Installation and Setup Guide
3-8
+
+
+
+
+
HEAT
DETECTOR
4-WIRE
SMOKE
DETECTORS
V128BP-002-V0
NO CONNECTION
C
NC
NO
RESET
RELAY 1, 2, 3, OR 4
4204 RELAY MODULE
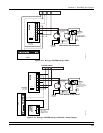
NOTES:
· PROGRAM THE RELAY TO
TRANSFER ON FIRE ZONE
RESET (ACTIVATION CODE 54).
SEE 4204 RELAY MODULE
SECTION FOR DETAILS.
· SECOND CODE AND OFF
ENTERED AT CONSOLE
MOMENTARILY INTERRUPTS
DETECTOR POWER.
SHOWN POWERED.
RELAY OPENS WHEN
POWER IS LOST.
EOL POWER
SUPERVISION
RELAY MODULE
A77-716B
2k
EOLR
TO
FIRE ZONE
TERMINALS
TO
AUXILIARY
POWER
TERMINALS
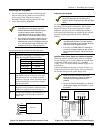
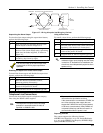
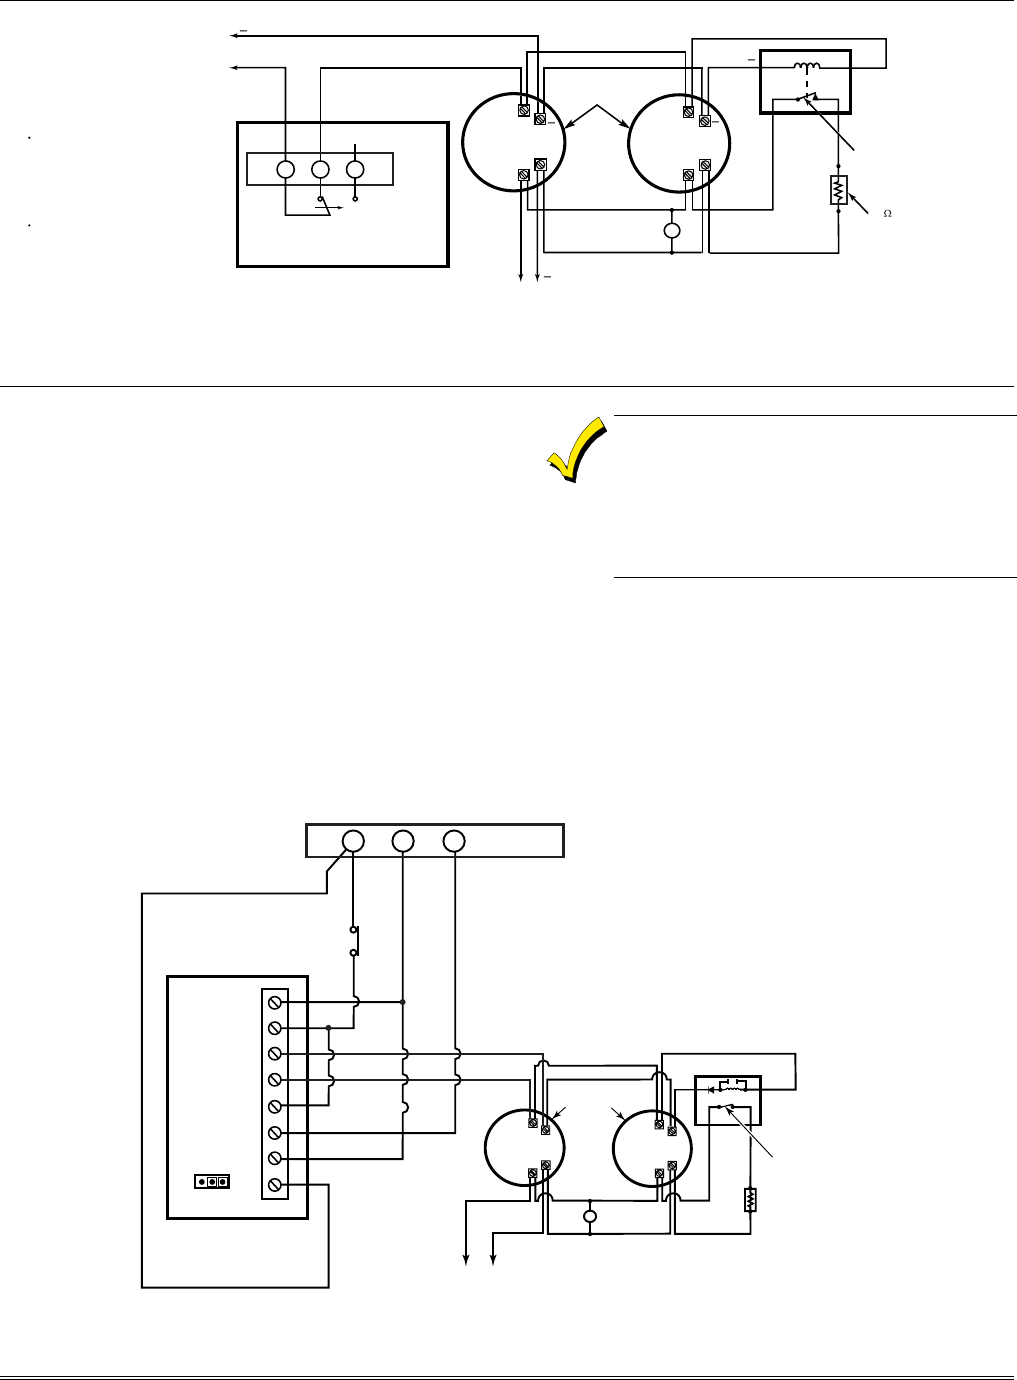
Figure 3-11: 4-Wire Smoke Detectors
Using Smoke Power Reversal Module
The 333PRM Polarity Reversing Module is used to
reverse the polarity of the positive and negative
voltages powering smoke detectors. The module is for
use with 4-wire smoke detectors that employ a sounder
and voltage-reversing feature. The module is triggered
by a pulsing bell output.
Smoke Detectors Compatible with the 333PRM
The 333PRM may be used with the System Sensor
2112/24AT and similar models with the required
operating features previously stated.
The 333PRM reverses polarity to smoke detectors
with Integral Temp-3 Sounders. Typically, in
alarm, each draws 49-60mA of current. The
control panel supplies only enough current for one
smoke detector. In order to attach more than
one, an external power supply and an external
relay may be required.
Installing the 333PRM
Mount the 333PRM inside the control panel’s cabinet or
in a separate cabinet using the double-sided tape
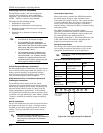
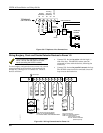
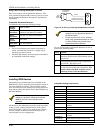
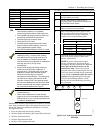
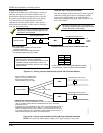
provided. Wire the 333PRM as shown in Figures 3-12,
3-13 or 3-14. Refer to the 333PRM Installation
Instructions for detailed information on the installation
of the module.
-
+
-
+
-
+
EOL POWER
SUPERVISION
RELAY MODULE
A77-761B
4-WIRE SMOKE
DETECTORS
2000
OHM
EOLR
TO FIRE ZONE
TERMINALS
HEAT
DETECTOR
+
–
SHOWN POWERED.
RELAY OPENS WHEN
POWER IS LOST
333PRM-001-V0
333 PRM
7
6
5
4
3
-2
+1
8
JUMPER
P1
NC
MOMENTARY
RESET SWITCH
JUMPER P1 ON
333 MODULE
MUST BE IN
"B" POSITION
FOUR-WIRE DETECTOR CIRCUIT
CONTROL PANEL
746
Figure 3-12: Wiring a 333PRM to the Control


