EPA Calibration Protocol Teledyne API – Technical Manual - Model 300E Family CO Analyzers
222
Refer to the Troubleshooting and Repair (see Section 13) of this manual if the instrument is not within the
allowed variations.
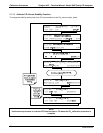
10.2.1. ZERO/SPAN CHECK PROCEDURES
The Zero and Span calibration can be checked in a variety of different ways. They include:
Manual Zero/Span Check - Zero and Span can be checked from the front panel keyboard. The procedure
is in Section 9.3 of this manual.
Automatic Ze
ro/Span Checks - After the appropriate setup, Z/S checks can be performed automatically
every night. See Section 9.3 of this manual for setup and operation procedures.
If using the AutoCal featu
r
e to perform a calibration check, set the CALIBRATE parameter to NO.
Zero/Span checks via remote contact closure = Zero/Span checks can be initiated via remote contact
closures on the rear panel. See Section 9.3.3.3 of this manual.
Zero/Spa
n via RS-232 port - Z/S checks can be controlled via the RS-232 port. See Section 9.3.3.3 and
Appendix A-6 of this manu
al for more details.
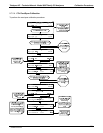
10.2.2. PRECISION CHECK
A periodic check is used to assess the data for precision. A one-point precision check must be carried out at
least once every 2 weeks on each analyzer at a CO concentration between 8.0 ppm and 10.0 ppm.
The analyzer must be operated in its normal sampling mode, and the precision test gas must pass through all
filters, scrubbers, conditioners, and other components used during normal ambient sampling.
The standards from which precision check test concentrations are obtained must be traceable to NIST-SRM.
Those standards used for calibration or auditing may be used.
To perform a precision check during the instrument set up, the sources of zero air and sample gas and
procedures should conform to those described in Section Error! Reference source not found. for analyzers
with no valve options or with an IZS valve option installed and Section 9.3.1 for analyzers with Z/S options
installed with
the following exception:
Connect the analyzer to a precision gas that has a CO concentration between 8.0 ppm and 10.0 ppm. If a
precision check is made in conjunction with a zero/span check, it must be made prior to any zero or span
adjustments.
Record this value.
Information from the check procedure is used to assess the precision of the monitoring data; see CFR 40 CFR
58
5
for procedures for calculating and reporting precision.
10.3. PRECISIONS CALIBRATION
Calibration must be performed with a calibrator that meets all conditions specified in QA Handbook
1
Vol II Part 1,
App 15, Sec. 4.4 & 5.4. The user should be sure that all flow meters are calibrated under the conditions of use
against a reliable standard. All volumetric flow rates should be corrected to 25
o
C (77
o
F) and 760 mm-Hg
(29.92in–Hg). Make sure the calibration system can supply the range of the concentration at a sufficient flow
over the whole range of concentration that will be encountered during calibration.
All operational adjustments to the M300E should be completed prior to the calibration. The following software
features must be set into the desired state before calibration.
If the instrument will be used for more than one range, it should be calibrated separately on each
applicable range.
Automatic temperature/pressure compensation should be enabled. See Section 6.6.
04288D DCN5752


