Configuring via the Web Server
Configuring the System
NetAXS™ Access Control Unit User’s Guide, Document 800-04410, Revision A 27
4. If the time zone will be linked to another time zone, select the “linked to” time zone’s number
from the drop down list.
Caution: We recommend that you read the explanation of time zone linking below (see Linking
Time Zones) before you link time zones. An example is provided to help you create the links
successfully.
5. Click the
Add Time Zone button.
Steps to modify a time zone:
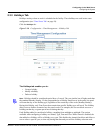
1. In the Tz column, click the number of the time zone you want to modify.
2. Change the time zone settings as you desire.
3. Click the
Modify button to accept the changes.
Steps to delete a time zone:
Caution: Do not delete a time zone that is currently in use.
1. In the Tz column, click the number of the time zone you want to delete.
2. Click the
Delete button.
3. Click
OK at the delete prompt.
Linking Time Zones
You assign each Time Zone a specific start time and end time. The maximum time range is from 12:00
a.m. to 11:59 p.m. Note that the time range cannot cross midnight. You can set this time range to be
effective for any day of the week, including weekends (Monday, Tuesday, Wednesday, Thursday,
Friday, Saturday, and Sunday). These days can also include holidays, which are considered special
days that take precedence over a standard day. Also, since Access Levels, Outputs, Inputs, Groups can
only be given one Time Zone selection at a time, you can link Time Zones together to create bigger
time zones that could not fit into a single Time Zone.
For example, suppose you must create a Cleaning Crew Time Zone. The time zone(s) are to be set up
as follows: Monday-Friday 5 p.m.-1 a.m., Saturday and Sunday 8 a.m.-1 p.m., no holidays. This
becomes three separate time zones, as follows.
Time Zone # Time Range
2 Monday-Friday, 5 p.m.-11:59 p.m.
(Remember, the time range cannot cross
midnight, so 11:59 p.m. is the limit.)
3 Tuesday-Saturday, 12:00 a.m.-1:00 a.m.
4 Saturday-Sunday, 8:00 a.m.-1:00 p.m.


