


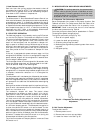
VI. MAIN BURNERS
For all applications, main burners are factory set and should
require no adjustment.
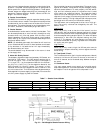
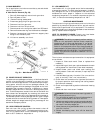
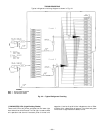
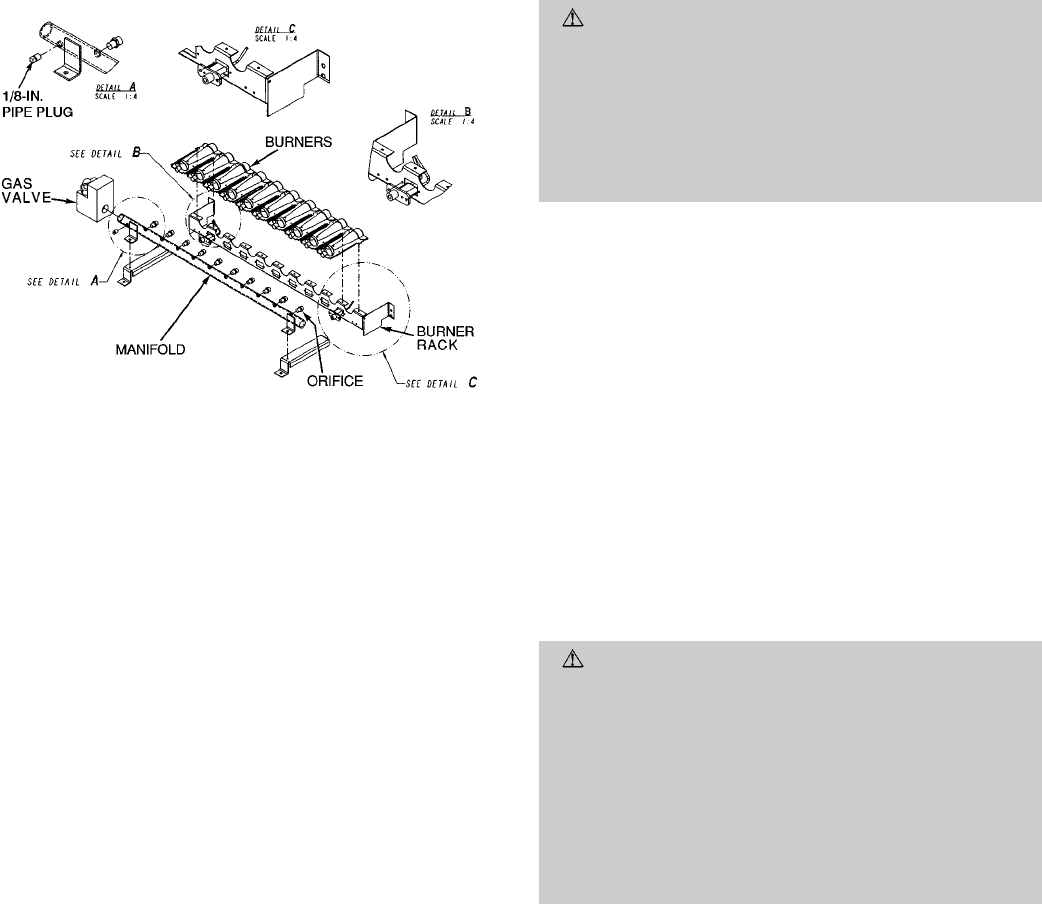
A. Main Burner Removal (Fig. 38)
1. Shut off (field-supplied) manual main gas valve.
2. Shut off power to unit.
3. Remove heating access panel.
4. Disconnect gas piping from gas valve inlet.
5. Remove wires from gas valve.
6. Remove wires from rollout switch.
7. Remove sensor wire and ignitor cable from IGC board.
8. Remove 2 screws securing manifold bracket to basepan.
9. Remove 4 screws that hold the burner support plate
flange to the vestibule plate.
10. Lift burner assembly out of unit.
VII. POWER EXHAUST OPERATION
The power exhaust packages are factory- or field-installed with
vertical units and optionally installed in the return air duct-
work for horizontal applications. The standard and the modu-
lating power exhaust are the two packages offered. The
modulating power exhaust package is equipped with a field-
adjustable static pressure controller to stage up to 4 power
exhausts stages which will maintain a building static pres-
sure. The blue sequencer located in the control box below the
control board can be adjusted, by removing the covers and
adjusting the set point dial to the desired building pressure.
The standard power exhaust package controls up to 2 stages
of power exhaust to maintain building pressure. These power
exhaust stages are staged according to a percentage of the
economizer dampers position.
VIII. HEAD PRESSURE CONTROL
Each unit has a fan cycling, outdoor thermostat to shut off
the outdoor-fan motor at 55 F. The head pressure control per-
mits unit to operate with correct condensing temperatures
down to 35 F outdoor-air temperature.
IX. LOW AMBIENT KIT
Low Ambient Kit is a fan speed control device actuated by
a temperature sensor. The field-installed accessory is specifi-
cally designed for use on this equipment and controls the
condenser-fan motor speed in response to the saturated
condensing temperature. For outdoor temperatures down to
−20 F, it maintains condensing temperature at 100 F.
CARE AND MAINTENANCE
To ensure continuing high performance, and to minimize the
possibility of premature equipment failure, periodic mainte-
nance must be performed on this equipment. This combina-
tion heating/cooling unit should be inspected at least once each
year by a qualified service person.
NOTE TO EQUIPMENT OWNER: Consult your local dealer
about the availability of a maintenance contract.
WARNING:
The ability to properly perform mainte-
nance on this equipment requires certain expertise,
mechanical skills, tools, and equipment. If you do not
possess these, do not attempt to perform any mainte-
nance on this equipment other than those procedures
recommended in the User’s Manual. FAILURE TO HEED
THIS WARNING COULD RESULT IN SERIOUS PER-
SONAL INJURY AND POSSIBLE DAMAGE TO THIS
EQUIPMENT.
The minimum maintenance requirements for this equipment
are as follows:
1. Inspect air filters each month. Clean or replace when
necessary.
2. Inspect cooling coil, drain pan, and condensate drain each
cooling season for cleanliness. Clean when necessary.
3. Inspect blower motor and wheel each heating and
cooling season. Clean and lubricate (if required) when
necessary.
4. Lubricate bearings every 6 months if fan runs continu-
ously or annually if fan runs intermittently.
5. Check electrical connections for tightness and controls
for proper operation each heating and cooling season.
Service when necessary.
6. Check and inspect heating section before each heating
season.
7. Check and clean vent screen if needed.
WARNING:
Failure to follow these warnings could re-
sult in serious personal injury:
1. Turn off electrical power to the unit before perform-
ing any maintenance or service on the unit.
2. Use extreme caution when removingpanels and parts.
As with any mechanical equipment, personal injury
can result from sharp edges, etc.
3. Never place anything combustible either on, or in con-
tact with, the unit.
4. Should overheating occur, shut off the electrical
supply.
Fig. 38 — Main Burner Removal
—28—