EMBROIDERING TUTORIAL
—
——————————————————————————————————————————————————————————————
——
68
13. Removing the Embroidery Frame and Fabric
After sewing is finished, remove the embroidery frame, and then remove the fabric from the frame.
Removing the embroidery
frame
CAUTION
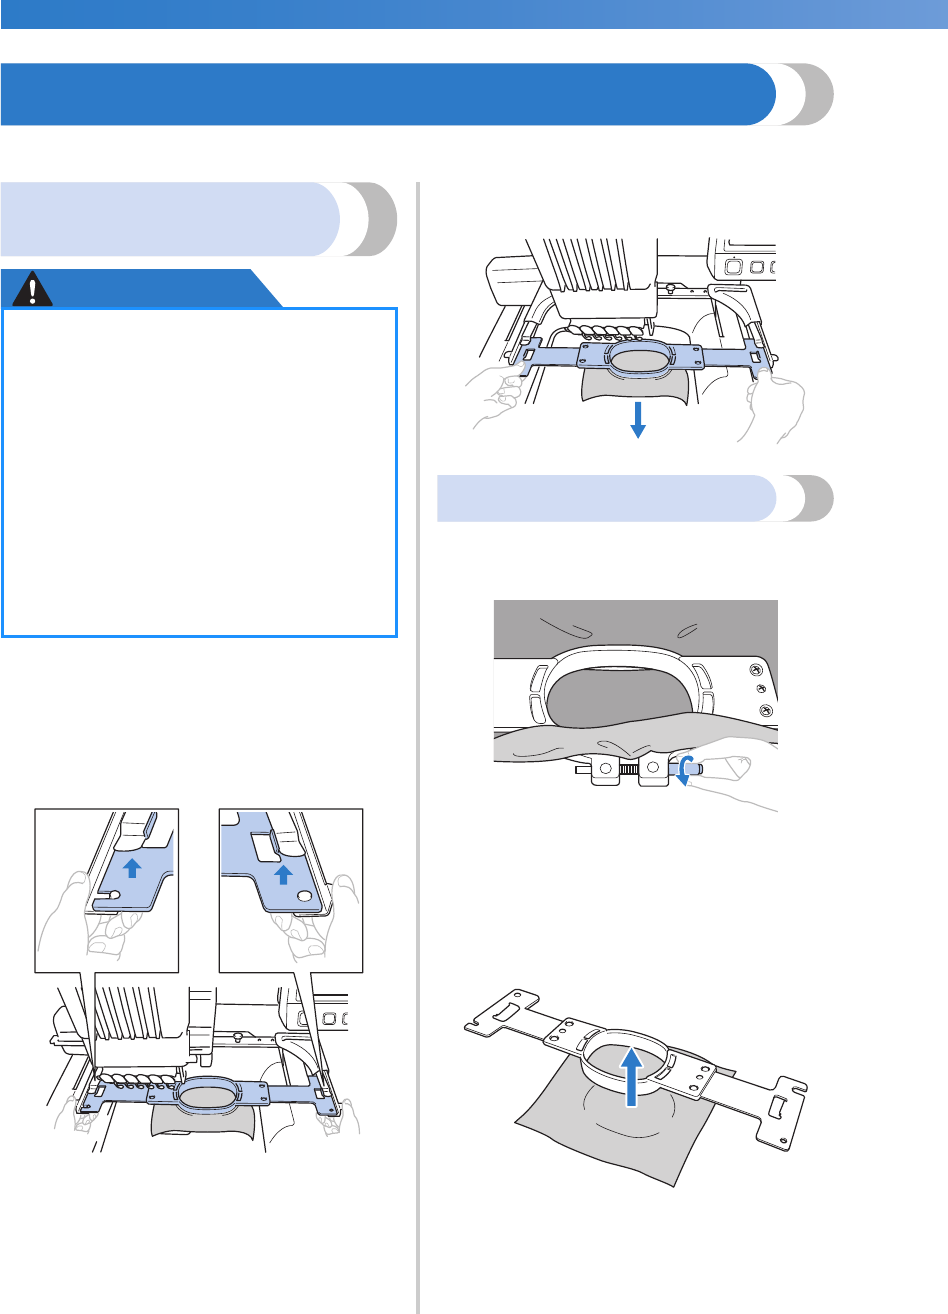
1
With both hands, grab the left and right sides
of the arms of the embroidery frame holder,
and then slightly lift up the frame.
The pins on the arms of the embroidery frame
holder should come out of the holes in the
sides of embroidery frame.
2
Pull off the embroidery frame toward you.
Removing the fabric
1
Loosen the outer frame screw.
X If the screw was tightened using a disc-
shaped screwdriver, use the included disc-
shaped screwdriver to loosen it.
2
Remove the outer frame, and then remove
the fabric.
●
When removing the embroidery frame,
make sure that the start/stop button is
lit in red. If the start/stop button is
flashing in green, the machine may start
sewing. If the machine accidentally
starts operating, injuries may result.
● When removing the embroidery frame,
be careful that the embroidery frame
does not hit any other part of the
machine.
● Do not lift up the embroidery frame
holder with extreme force, otherwise it
may be damaged.


