


Maintenance 249
7
——
——————————————————————————————————————————————————
—
————————————————————————————————
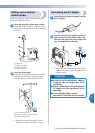
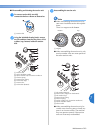
■ Disassembling and cleaning the tension unit
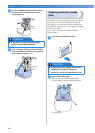
1
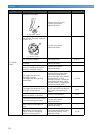
To remove tension dial, turn dial
counterclockwise as shown on illustration.
1 Tension dial
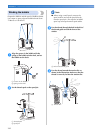
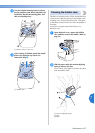
2
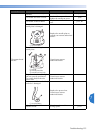
Using the included cleaning brush, remove
any lint and dust from the two pieces of felt
washers (top, bottom) inside the tension
dial.
1 Tension dial
2 Nylon shoulder washer
3 Nylon washer only for tension number 4
4 Tension spring
5 Tension base spring
6 Felt washer (top)
7 Tension disc
8 Felt washer (bottom)
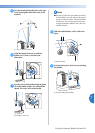
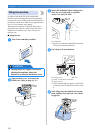
3
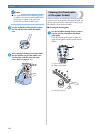
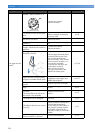
Reassembling the tension unit.
Note
● When reassembling the tension unit, be
sure not to install the tension disc upside-
down.
There is a magnet on the bottom.
1 Magnet
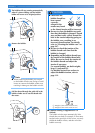
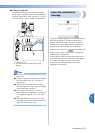
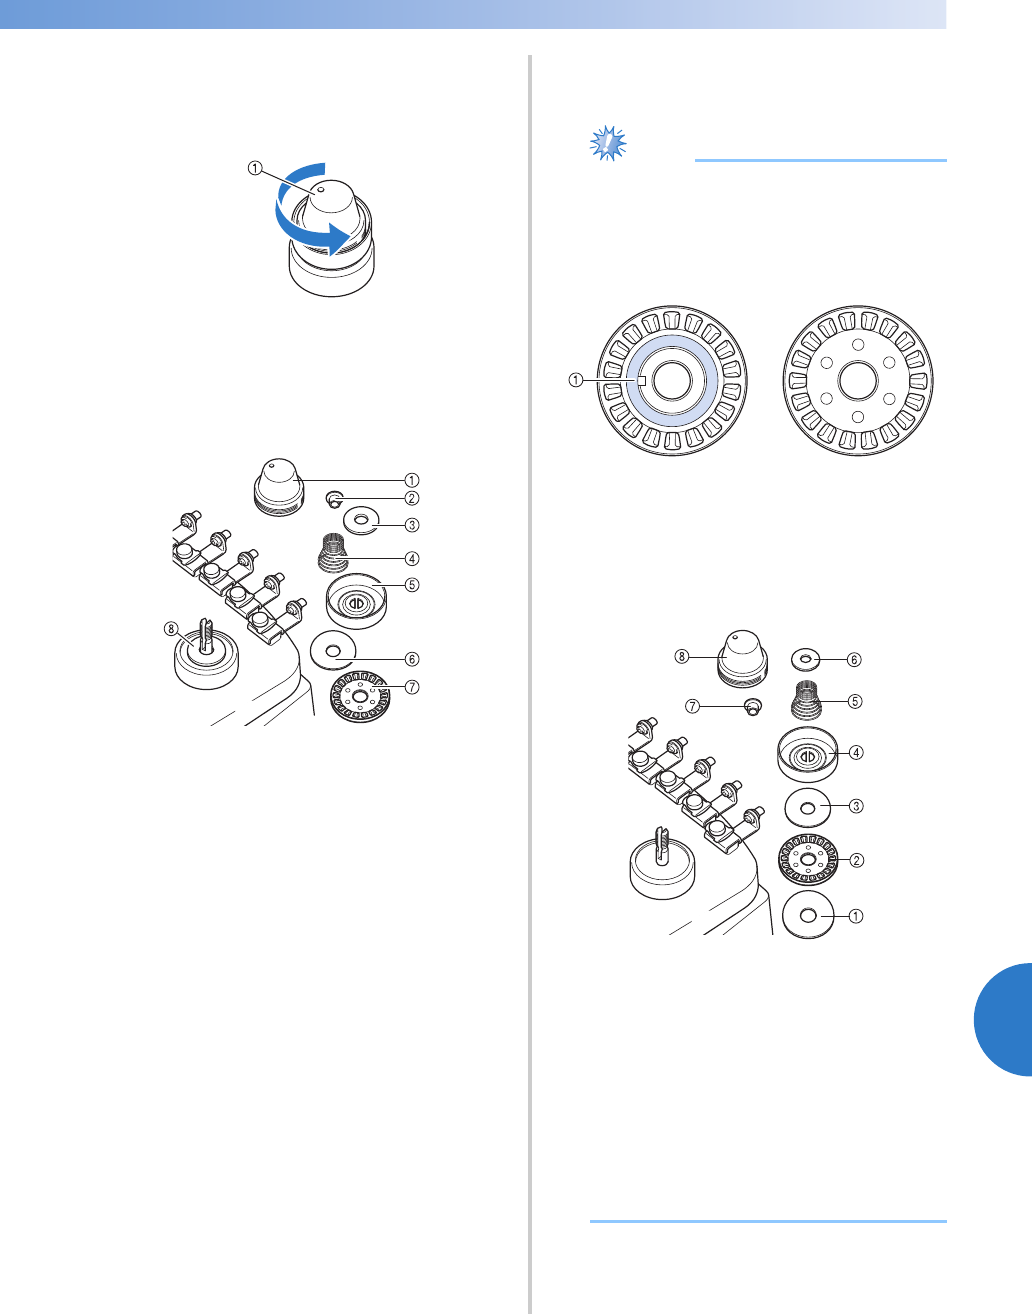
● When reassembling the tension unit, only
tension number 4 has one more part than
the other tension units.
1 Felt washer (bottom)
2 Tension disc (magnet on the bottom)
3 Felt washer (top)
4 Tension base spring
5 Tension spring
6 Nylon washer (only for tension number 4)
7 Nylon shoulder washer
8 Tension dial
● When reassembling the tension unit, be
careful not to lose any parts or install any
parts in an incorrect order. The machine
may not operate correctly if the tension
units are incorrectly reassembled.
Bottom Top