


Using the Settings Key 195
6
——
———————————————————————————————————————————————————————————————————
—
———————————————
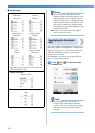
■ Page 3
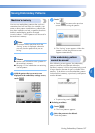
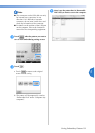
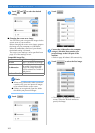
B Reserved Needle
A certain thread color can be set to a specific
needle bar. The specified color remains
assigned to the needle bar specified here until
the setting is cancelled. This feature is not
accessible through the embroidering screen.
(Refer to “Reserved Needle Bar Settings” on
page 132.)
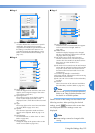
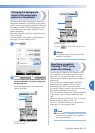
■ Page 4
C Screen Saver
Select the length of time until the screen saver
appears, and change the image of the screen
saver. (Refer to page 201.)
D Opening Screen
The machine can be set so that the opening
screen is either displayed (“ON”) or not
displayed (“OFF”) when the machine is turned
on.
E Light
The sewing light can be set to be turned either
on or off. (Refer to page 20 or 203.)
F Speaker
The volume of operation sounds and alarm
sounds can be adjusted. (Refer to page 21 or
204.)
G Thread Sensor
Set “Thread Sensor” to either “ON” or “OFF”.
(Refer to page 204.)
H Mouse Pointer
Change the shape of the pointer when a USB
mouse is used. (Refer to page 205.)
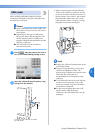
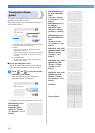
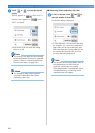
■ Page 5
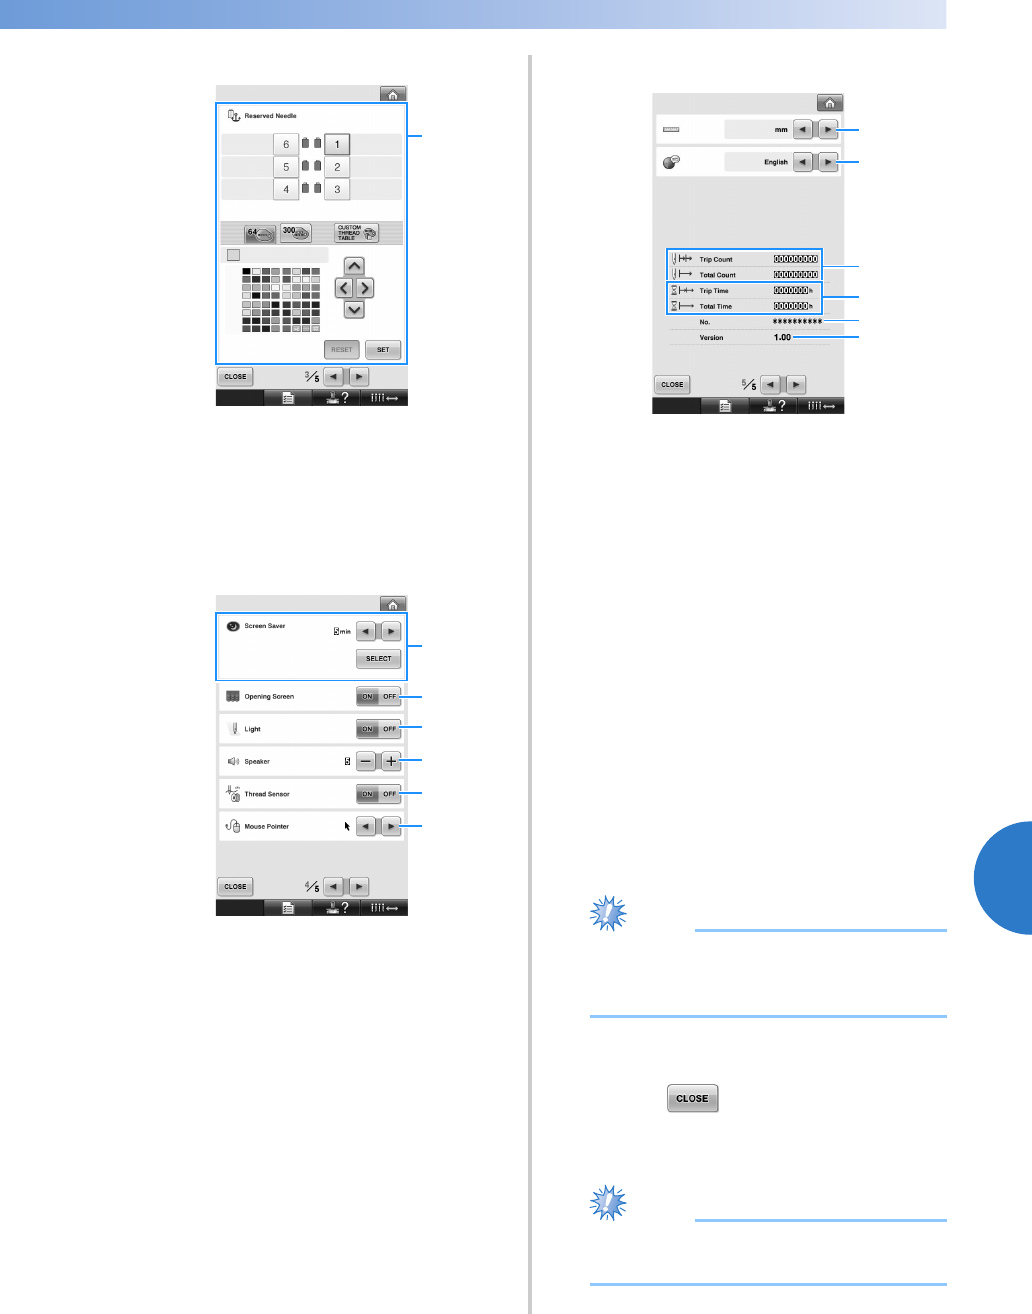
I Units of Measure
Enables the units of measurements that appear
in the screens to be changed. (Refer to
page 205.)
J LANGUAGES
Enables the display language to be changed.
The keys and messages appear in the selected
language. (Refer to page 205.)
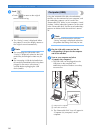
K The Total Count counter shows the total
number of stitches sewn, and the Trip Count
counter show the number of stitches that have
been sewn since the machine’s last
maintenance.
L The Total Time counter shows the total amount
of time that the machine has been used, and the
Trip Time counter shows the amount of time
that the machine has been used since its last
maintenance.
Use counters K and L as a standard for
performing periodic maintenance and for receiving
maintenance for the machine.
M The “No. ##” is the number for the embroidery
machine.
N Version
Shows the version of the software installed on
this embroidery machine. (Refer to page 271.)
Note
● Check with your local authorized Brother
dealer or at “http://solutions.brother.com”
for details on available updates.
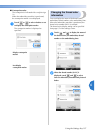
Details of each of the settings are described in the
following sections. After specifying the desired
settings, touch to return to the screen that
was displayed before the settings screen was
displayed.
Note
● Some settings cannot be changed while
sewing.
B
H
G
C
F
E
D
L
N
K
J
I
M