EMBROIDERING TUTORIAL
—
——————————————————————————————————————————————————————————————
——
50
2
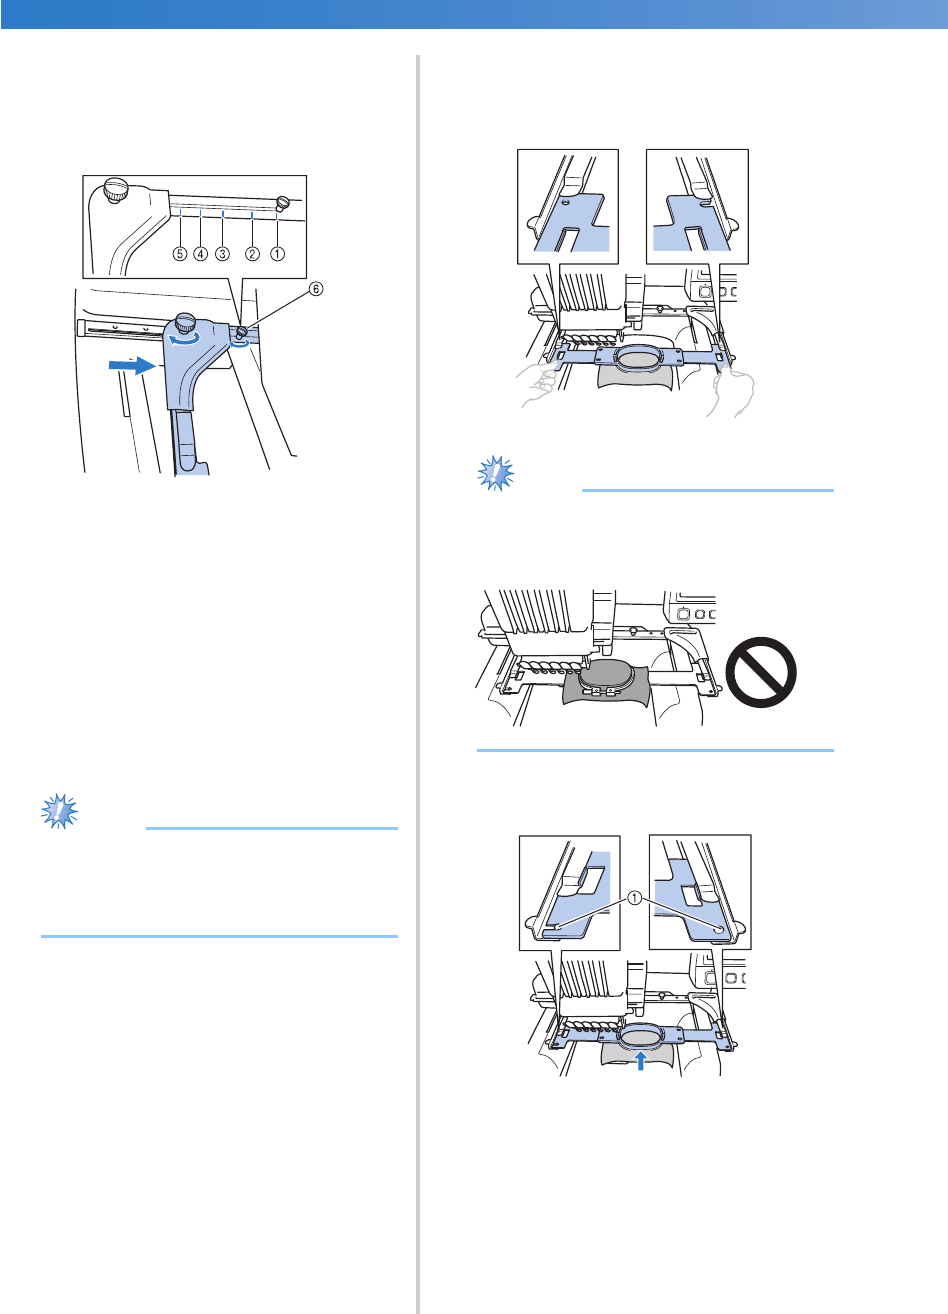
Move the left arm to align the screw on the
right side with the mark for the embroidery
frame to be installed, and then tighten the
thumb screws.
For this example, align with mark 5.
1 Mark for extra-large embroidery frame
2 Mark for large embroidery frame
3 Mark for medium embroidery frame
4 Mark for embroidery frame for industrial
embroidery machines*
5 Mark for small embroidery frame
6 Align the screw with the mark.
* When using embroidery frames for industrial
embroidery machines, the machine does not
recognize the embroidery area of the frame. Be
sure to use the trial sewing function to check
that the pattern fits within the embroidery area.
If an embroidery frame for an industrial
embroidery machine is installed, the right arm
of the embroidery frame holder must also move.
For details, refer to page 224.
Note
● Please firmly tighten the two thumb screws
with included disc-shaped screwdriver. The
machine will recognize the wrong frame
size, if the two screws are not tightened.
X The embroidery frame holder is ready for
the embroidery frame to be attached.
3
Hold the embroidery frame level, and then
simultaneously align both the left and right
mounts with the embroidery frame holder
clips.
• The inner frame should be on top.
Note
● If the outer frame is on top, as shown
below, the embroidery frame is incorrectly
attached.
4
Insert the embroidery frame until it snaps
into place.
1 Make sure that the pins on the left and right arms
of the embroidery frame holder fit into the
positioning slot and hole on the embroidery
frame.


