


Attaching the Embroidery Frame to the Machine 49
2
——
—————————————————————————————————————————————————————————————
—
—————————————————————
8. Attaching the Embroidery Frame to the Machine
After hooping the fabric in the embroidery frame, attach the frame to the embroidery machine.
CAUTION
Note
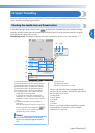
● Before attaching the embroidery frame, check that there is enough thread in the bobbin.
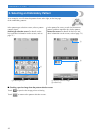
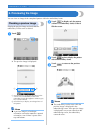
Attaching the embroidery frame
Adjust the width of the embroidery frame holder to the size of the embroidery frame, and then attach the
embroidery frame to the machine. As an example, the procedure for attaching the small embroidery frame is
described below.
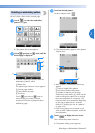
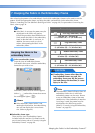
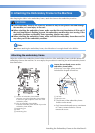
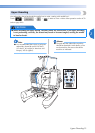
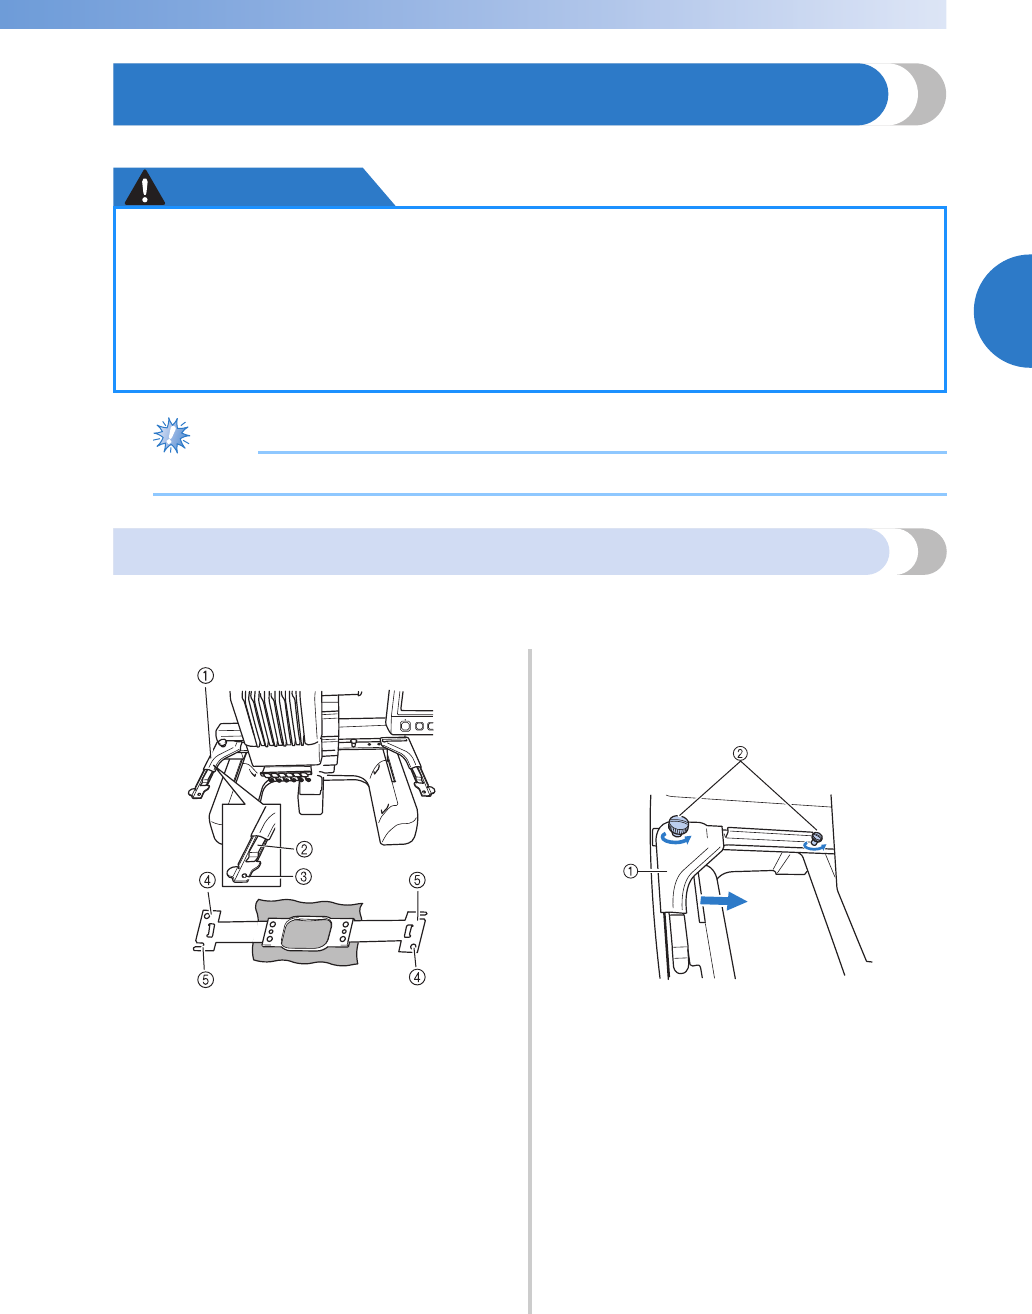
1 Left arm of embroidery frame holder
Move the arm of the embroidery frame holder
to the left or right to adjust it to the size of the
embroidery frame.
2 Clip on embroidery frame holder.
Insert the embroidery frame into the clips on the
embroidery frame holder.
3 Positioning pin
4 Holes
5 Positioning slots
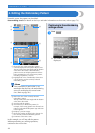
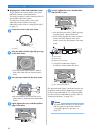
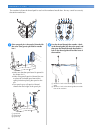
1
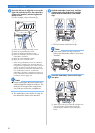
Loosen the two thumb screws on the
embroidery frame holder.
If the screw is too tight, please use the
included disc-shaped screwdriver.
1 Left arm
2 Thumb screws
X The left arm of the embroidery frame
holder can be moved.
• Only loosen the thumb screws a maximum
of 2 turns counterclockwise. Do not
remove the screw.
●
If the embroidery frame is not correctly attached it may hit the presser foot and damage
the machine, or cause injury to the user.
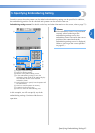
● When attaching the embroidery frame, make sure that the start/stop button is lit in red. If
the start/stop button is flashing in green, the embroidery machine may start sewing. If the
embroidery machine accidentally starts operating, injuries may result.
● When attaching the embroidery frame, make sure that the embroidery frame does not hit
any other part of the embroidery machine.