


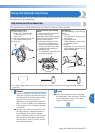
Using the Optional Cap Frame 229
7
——
——————————————————————————————————————————————————
—
————————————————————————————————
2
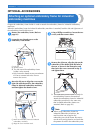
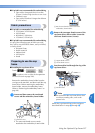
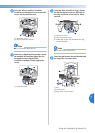
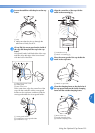
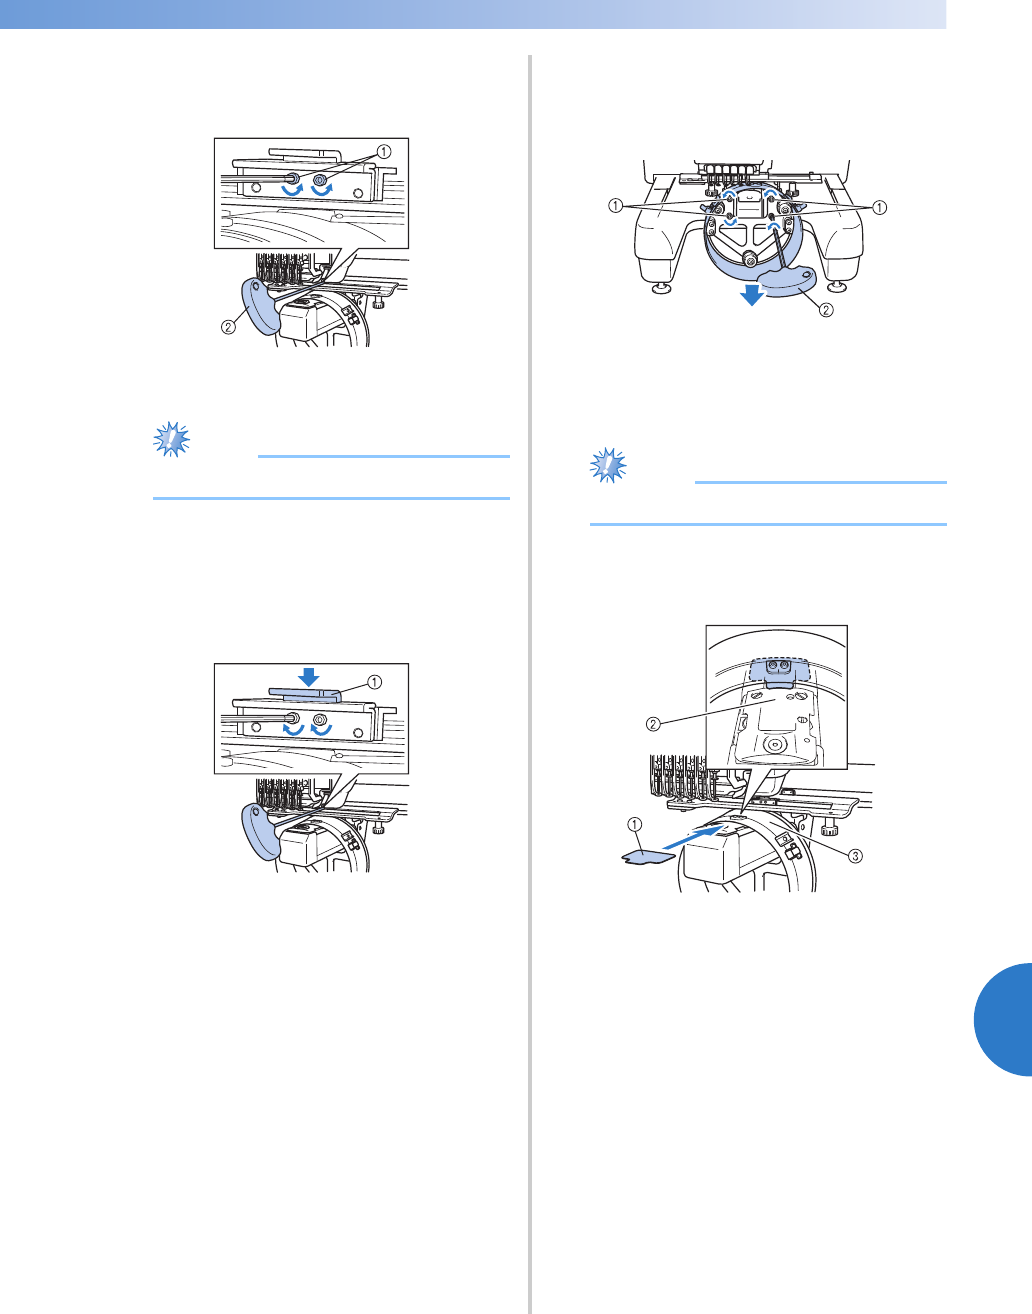
Using the Allen screwdriver (medium),
loosen the two hexagonal screws. Loosen the
screws only by about one turn.
1 Hexagonal screws
2 Allen screwdriver (medium)
Note
● Do not loosen them too far.
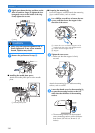
3
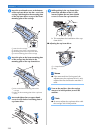
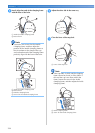
Lower the L-shaped bracket to make it touch
the machine bed and then tighten the two
hexagonal screws using the Allen
screwdriver (medium). Firmly tighten the
screws.
1 L-shaped bracket
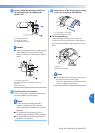
4
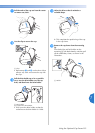
Using the Allen screwdriver (large), loosen
the four hexagonal screws on the inside of
the ring. Loosen the screws only by about
one turn.
1 Hexagonal screws
2 Allen screwdriver (large)
X When the screws are loosened, the ring
can be lowered.
Note
● Do not loosen them too far.
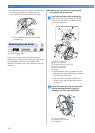
5
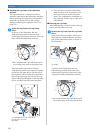
Insert the pad between the machine bed and
the ring of the cap frame driver.
1 Pad
2 Machine bed
3 Ring of the cap frame driver