BASIC SETTINGS AND HELP FEATURE —————————————————————————————————————————————————————————
——
196
Changing the display
guides
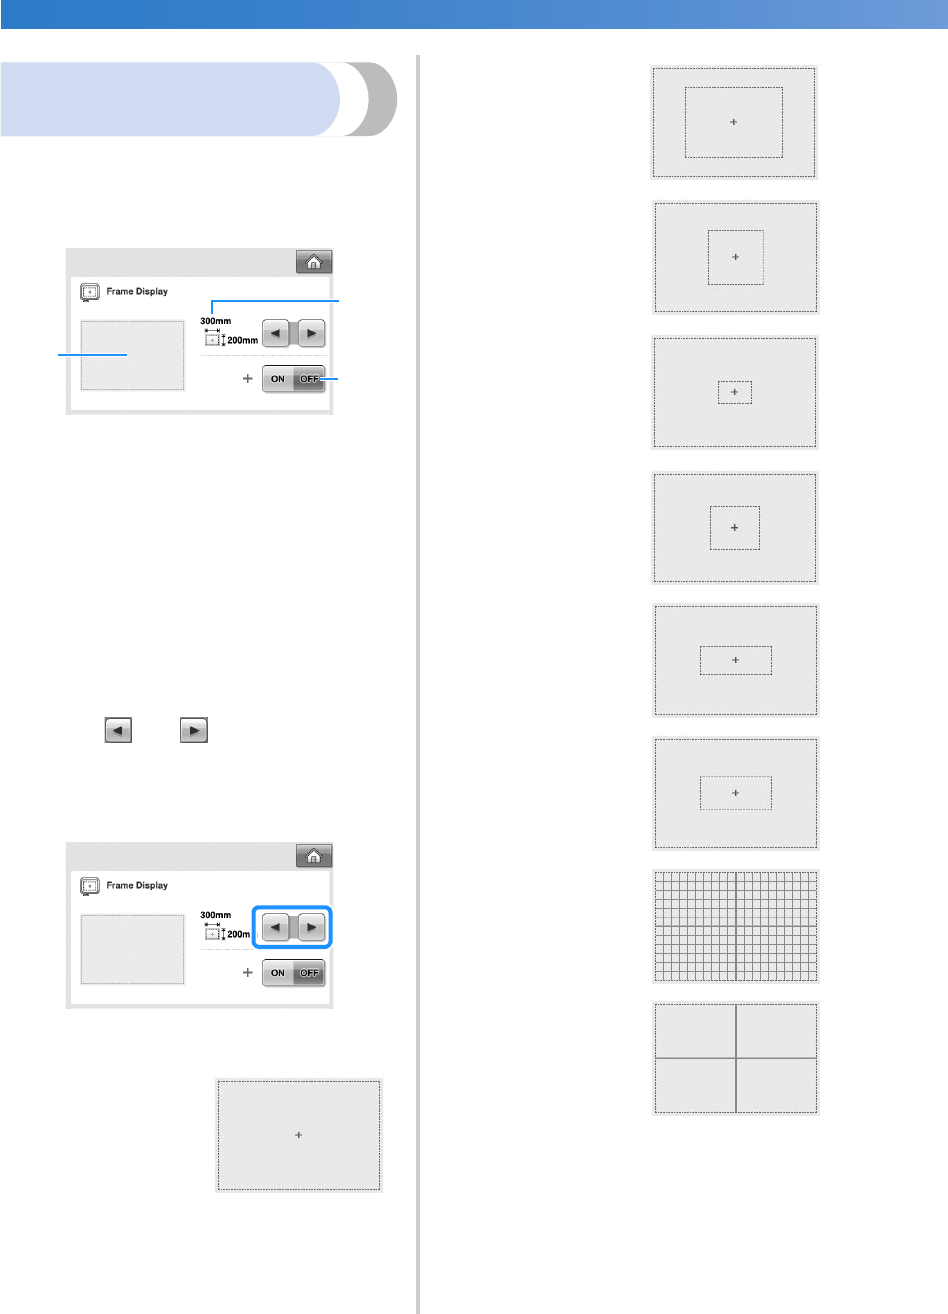
The guides in the pattern display area can be set for
the desired embroidery frame.
The guide settings can be specified from page 1/5
of the settings screen.
1 How the guides will appear with the specified
settings can be previewed here.
2 AREA
Specifies the size of the embroidery frame
displayed as a guide.
The guides that appears does not indicates the
size of the embroidery frame that is actually
installed.
3 CENTERPOINT
Display (ON) or hides (OFF) the centerpoint
marker of the design.
■ Size of the embroidery frame
When the embroidery machine is purchased,
the extra-large embroidery frame is selected.
1
Touch and to select the desired
embroidery frame display.
The embroidering area for the desired
embroidery frame is displayed.
(Example: When the centerpoint if set to “ON”.)
Embroidering area of
the extra-large
embroidery frame
[200 mm × 300 mm
(7-7/8 inches × 11-3/4
inches)]
1
3
2
Embroidering area of
the large embroidery
frame
[130 mm × 180 mm
(5-1/8 inches × 7-1/8
inches)]
Embroidering area of
the medium
embroidery frame
[100 mm × 100 mm
(4 inches × 4 inches)]
Embroidering area of
the small embroidery
frame
[40 mm × 60 mm
(1-1/2 inches × 2-3/8
inches)]
Embroidery area of the
optional cylinder frame
[80 mm × 90 mm
(3 inches × 3-1/2
inches)]
Embroidery area of the
optional cap frame
[50 mm × 130 mm
(2 inches × 5-1/8
inches)]
Embroidery area of the
optional cap frame
[60 mm × 130 mm
(2-3/8 inches × 5-1/8
inches)]
Grid lines
Cross grid lines


