EMBROIDERING TUTORIAL
—
————————————————————————————————————————————
—
20
2. Turning ON the Machine
Connect the power supply cord, and then turn on the embroidery machine. For precautions concerning the
power supply, refer to page 14.
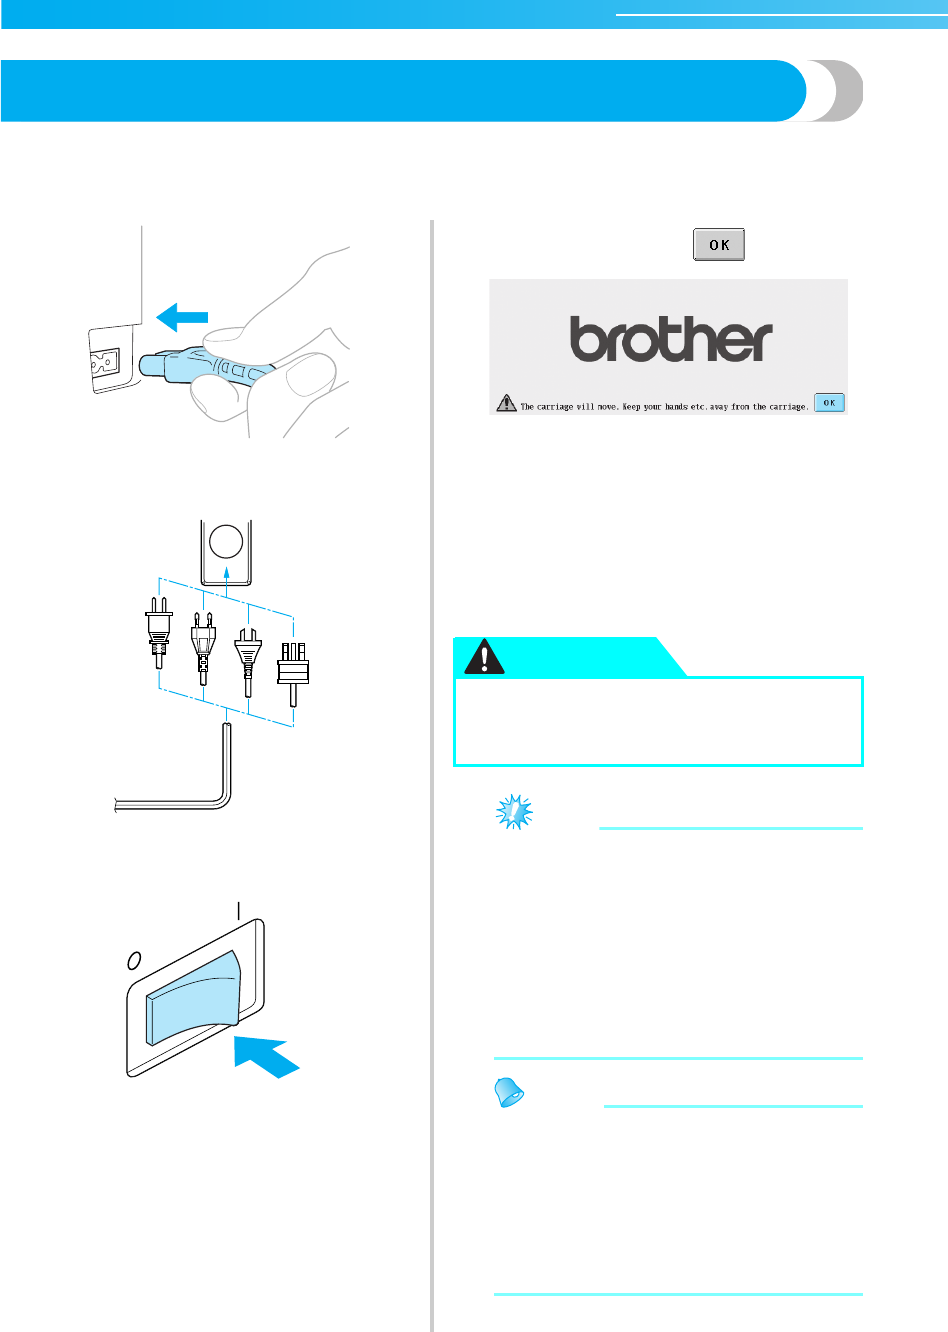
1
Plug the power supply cord into the machine.
2
Insert the plug of the power supply cord into a
household electrical outlet.
3
Switch on the main power switch on the back
of the machine to “I”.
X The buzzer beeps once and the LCD screen
comes on.
4
When the screen shown below appears after
the initial screen, touch .
X The pattern type selection screen appears,
and the start/stop button lights up in red.
5
The carriage moves to its initial position.
• If the number 1 needle bar is not already at
the embroidering position, the needle bar
case moves and the number 1 needle bar
moves to the embroidering position.
Note
● (For U.S.A. only)
This appliance has a polarized plug (one
blade wider than the other). To reduce the
risk of electrical shock, this plug is intended
to fit into a polarized outlet in only one
direction. If the plug does not fit fully in the
outlet, reverse the plug. If it still does not fit,
contact a qualified electrician to install the
proper outlet. Do not modify the plug in any
way.
Memo
● If the machine is turned off in the middle of
embroidering, the machine will
automatically save the design position
when turned on again. At that time, you will
be asked if you wish to continue
embroidering or begin a new operation.
(Refer to “Resume Embroidering After
Turning OFF the Machine” on page 83.)
● Make sure to keep your hands and other
items away from the carriage, in order to
prevent any injuries.
CAUTION


