


7 APPENDIX
This chapter provides descriptions of techniques for sewing applications, pointers for
creating beautiful embroidery, and details on maintenance procedures and corrective
measures that should be taken when a problem occurs.
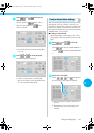
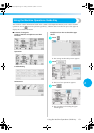
Appliqué Sewing ...................................................................................................156
Sewing appliqué patterns / 156 Using a frame pattern to create appliqués (1) / 157
Using a frame pattern to create appliqués (2) / 158
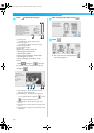
Helpful Tips for the Operation of the Machine .....................................................160
Checking the thread tension of built-in patterns / 160
Sewing a pattern aligned with a mark on the fabric / 161
Color thread table / 163 Colors of Tajima (.dst) embroidery data / 163
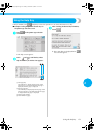
Creating Beautiful Embroidery ..............................................................................164
Threads / 164 Stabilizers (Backing) / 165
Hooping Techniques / 166 Fabric/stabilizer compatibility chart / 167
OPTIONAL ACCESSORIES
Attaching an optional embroidery frame for industrial embroidery machines ......168
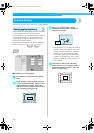
Using the Optional Cap Frame..............................................................................169
Cap frame and its accessories / 169 Types of caps / 170
Fabric precautions / 171 Preparing to use the cap frame / 171
Attaching the standard cap frame to the mounting jig and putting a cap into the frame / 176
Attaching the advanced cap frame to the mounting jig and putting a cap into the frame / 180
Installing the embroidery frame holder / 185 Additional digitizing information / 186
Using the Optional Bobbin Winder.......................................................................188
Precautions / 188 Optional bobbin winder and its accessories / 188
Setting up the optional bobbin winder / 189 Connecting the AC adapter / 189
Winding the bobbin / 190
Maintenance .........................................................................................................193
Cleaning the LCD / 193 Cleaning the machine surface / 193
Cleaning the hook / 193 Cleaning around the needle plate / 194
Cleaning the bobbin case / 195 Oiling the machine / 196
Troubleshooting ....................................................................................................198
On-screen troubleshooting / 198 Troubleshooting / 199
Error messages / 207 If the LCD cannot be read / 213
If the machine does not respond when a key is pressed / 213
Specifications ........................................................................................................215
Embroidery machine specifications / 215
Index .....................................................................................................................216