Using the Optional Cap Frame 177
7
2
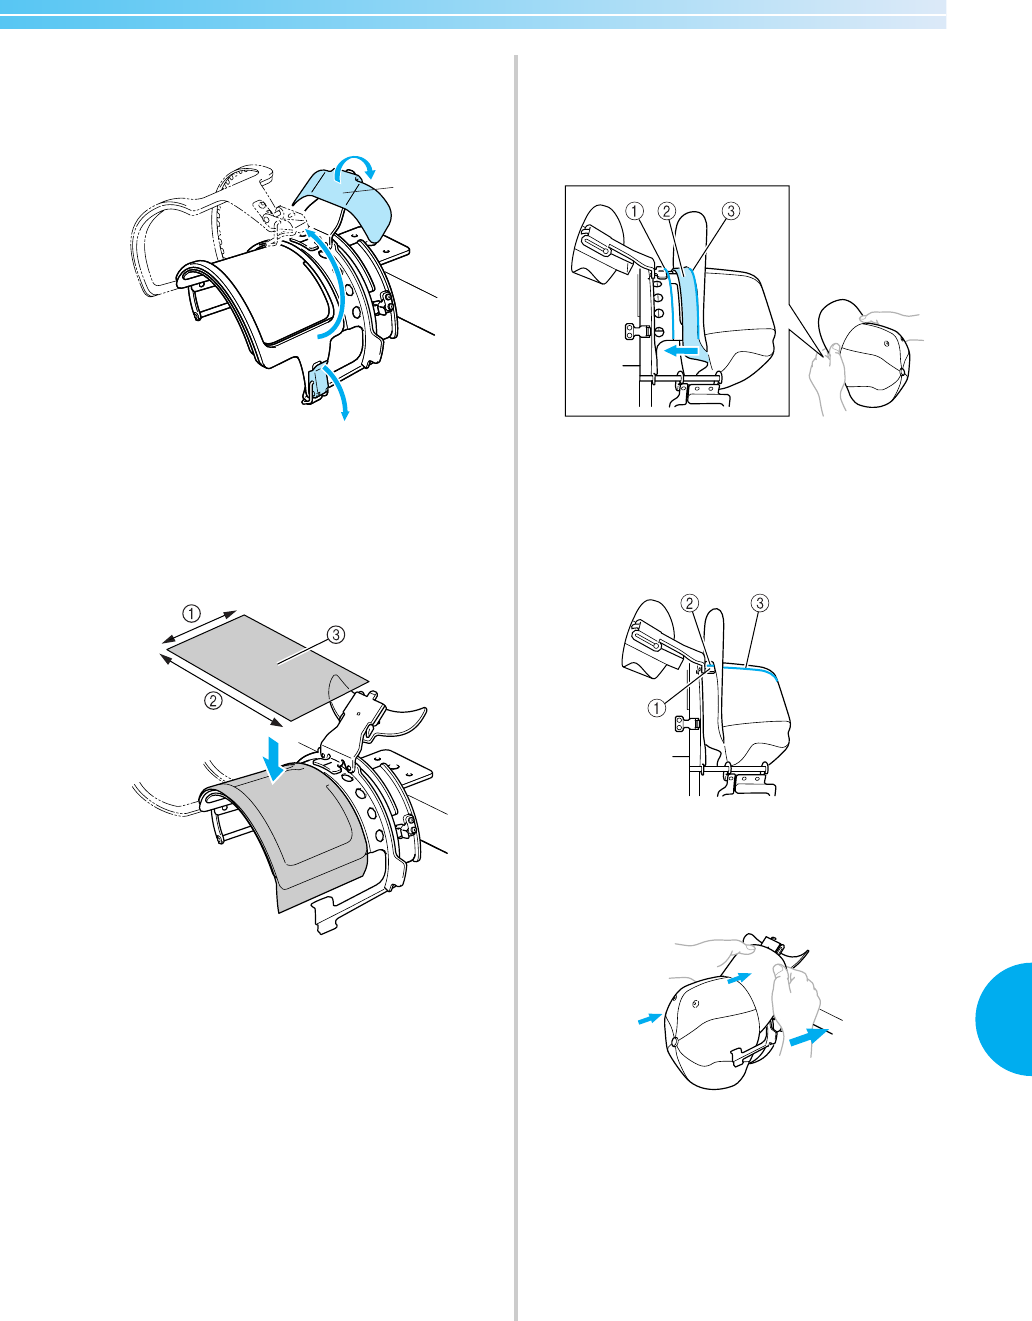
Release the snap lock on the standard cap
frame down and then disengage the latch.
Open the clamping frame. Also, open brim
presser.
1 Snap lock released
2 Clamping frame opened
3 Brim presser
3
Placing a sheet of stabilizer.
Placing a sheet of about 100 mm (4 inches) x
250 mm (10 inches) of stabilizer on top of the
lower frame, place a cap in the frame.
1 100 mm (4 inches)
2 250 mm (10 inches)
3 Stabilizer
4
Lift up (flip) the sweat guard on the inside of
the cap, and then place the cap in the
standard cap frame.
Using both hands, hold both sides of the cap,
and then align the edge of the lower frame
with the base of the brim.
1 Edge of the lower frame
2 Sweat guard
3 Base of the brim
At the same time, align the centerline of the
cap with the centerline of the sweat guard
holder on the standard cap frame, and then
slide the sweat guard under the sweat guard
holder.
1 Sweat guard holder
2 Centerline of sweat guard holder
3 Centerline of cap
5
After arranging the brim, firmly push in the
cap as far as possible.
1
3
2
Sapphire_chapt7.fm Page 177 Friday, November 18, 2005 12:10 PM


