


12 C3662M (6/08)
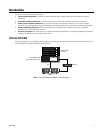
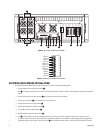
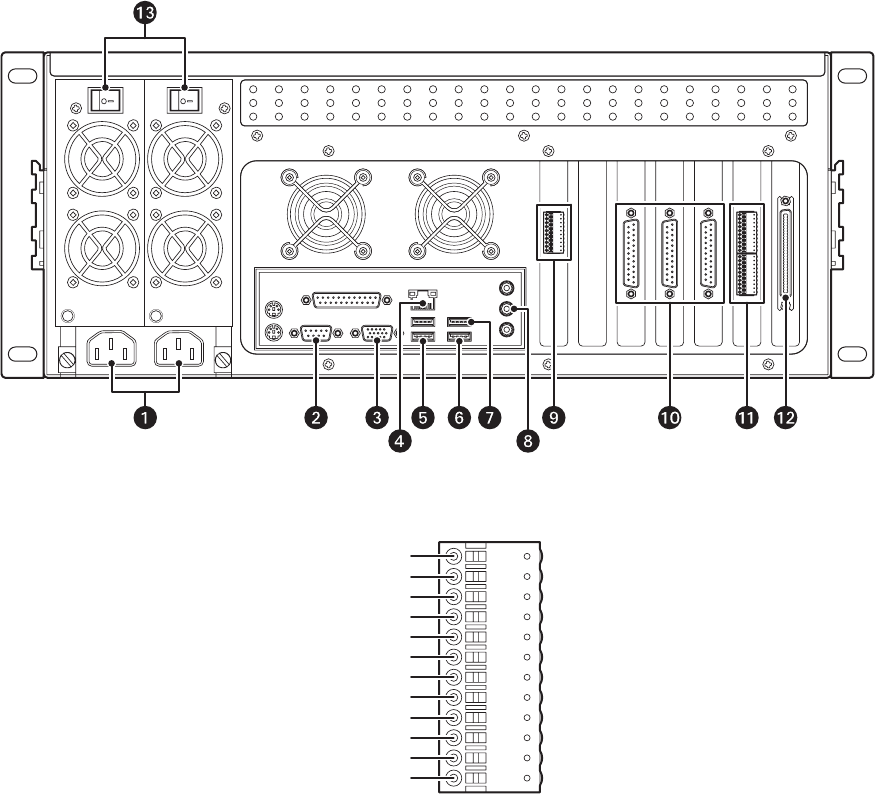
Figure 3. Rear Panel of DS Enterprise SAVR
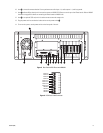
Figure 4. DS Enterprise SAVR Audio Connector
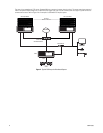
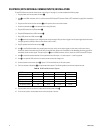
DS XPRESS (WITH XMUX2) INSTALLATION
To install DS XPress with XMUX2, refer to Figure 5 on page 13, and then complete the following steps:
1. Plug the power cord into the power connector
ì.
2. Item î is the COM1 connector, which is used to connect RS-232-based PTZ cameras. Refer to PTZ Installation on page 29 for installation
details.
3. Plug the monitor into the monitor connector ï and its power cord into an electrical outlet.
4. Connect the network port
ñ to the network switch using Cat5 cable.
5. Plug the USB mouse into a USB connector ó.
6. Plug the USB keyboard into a USB connector r.
7. Plug a USB printer into a USB connector s.
8. Plug PC speakers into the line out connector
t.
9. Item
u is the FlashGuard cardlet relay output (bottom two pins), which can be used to trigger an alarm when a critical error occurs.
Connect the alarm to the bottom two pins of the 6-pin terminal block. Refer to the FlashGuard and the WatchDog Service on page 40 for
more details about the relay output. The top four pins in
u are the COM5 connector, which is used to wire RS-422–based PTZ cameras.
GROUND 4
GROUND 3
GROUND 2
GROUND 1
AUDIO OUT 4
AUDIO OUT 3
AUDIO OUT 2
AUDIO OUT 1
AUDIO IN 4
AUDIO IN 3
AUDIO IN 2
AUDIO IN 1