


1-85
1. Specifications
6-12. Installing the Rear Panel on the Wall
Be sure to confirm that the wall is strong enough to suspend
the unit.
See either Item a) or b) below depending on the wall type.
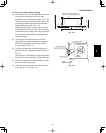
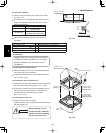
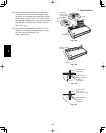
a) If Wooden Wall
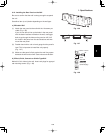
(1) Attach the rear panel to the wall with the 10 screws pro-
vided. (Fig. 1-36)
If you are not able to line up the holes in the rear panel
with the beam locations marked on the wall, use toggle
bolts to go through the holes on the panel or drill 3/16"
dia. holes in the panel over the stud locations and then
mount the rear panel.
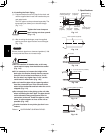
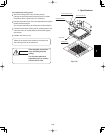
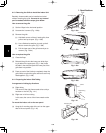
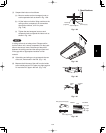
(2) Double-check with a ruler or level gauge that the panel is
level. This is important to install the unit properly.
(Fig. 1-37)
(3) Make sure the panel is flush against the wall. Any space
between the wall and unit will cause noise and vibration.
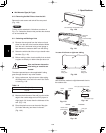
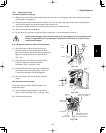
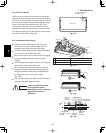
b) If Block, Brick, Concrete or Similar Type Wall
Make 3/16" dia. holes in the wall. Insert rawl plugs for appropri-
ate mounting screws. (Fig. 1-38)
3/16
"
dia. hole
1-3/16
"
or more
Rawl plug
(Field supply)
Fig. 1-38
Fig. 1-37
Fig. 1-36
1