


1-84
1. Specifications
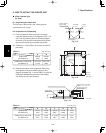
Wall Mounted Type (K1 Type)
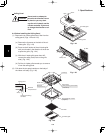
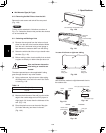
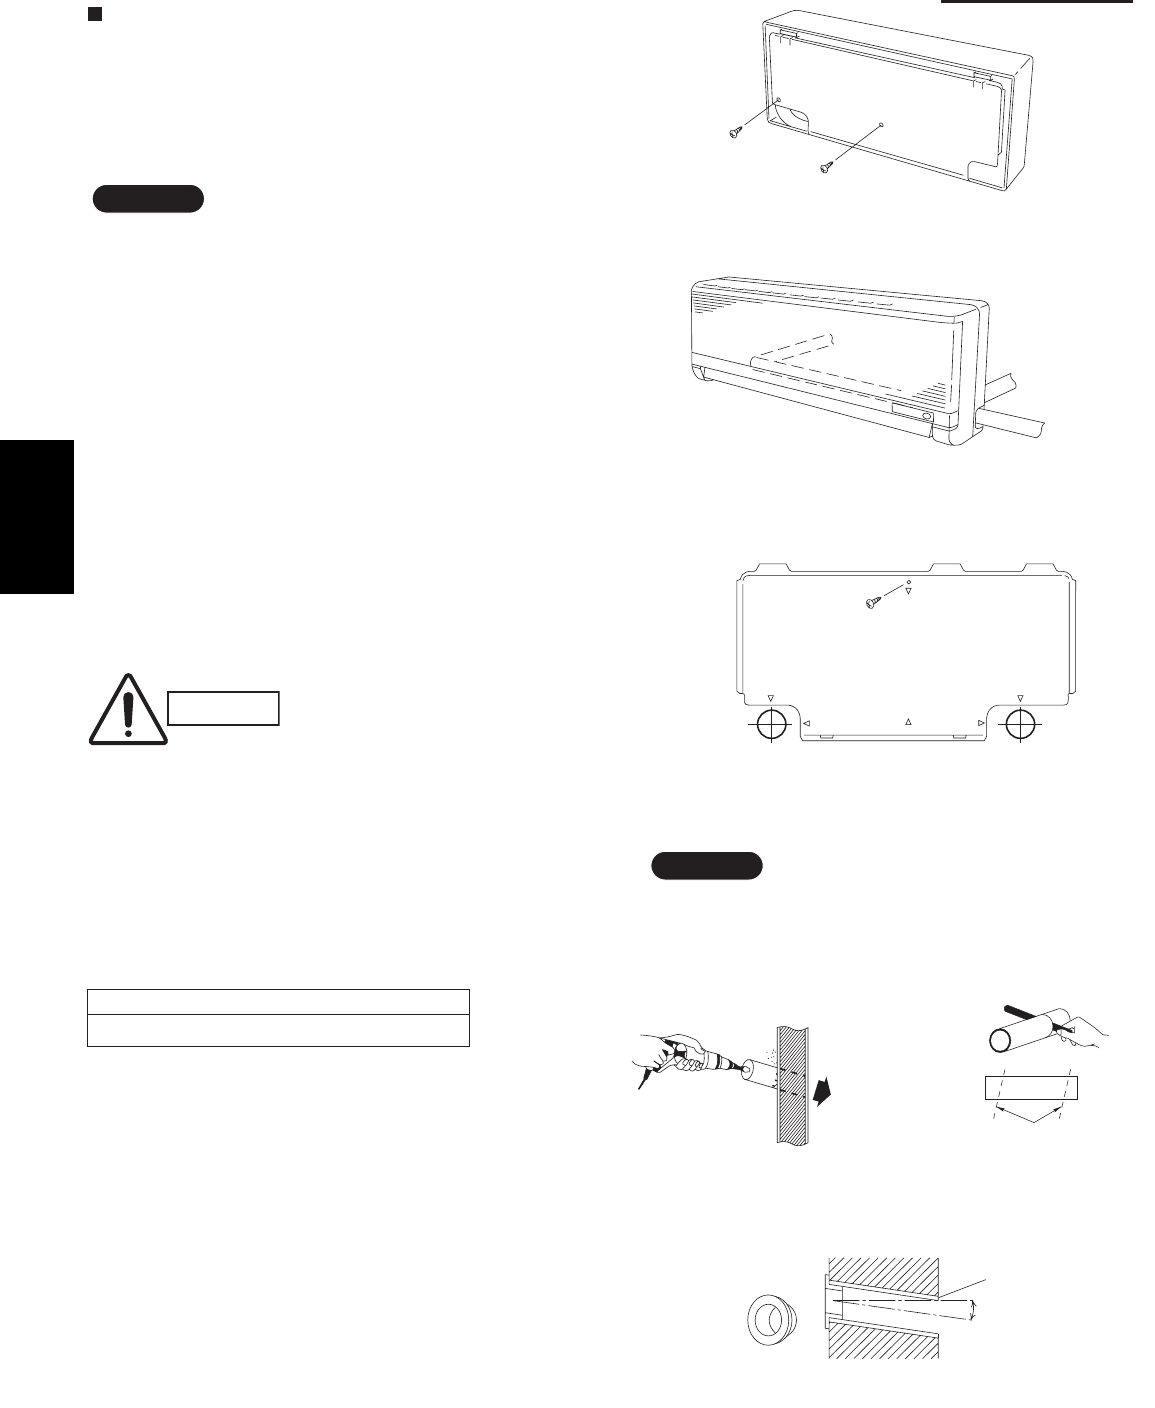
6-10. Removing the Wall Fixture from the Unit
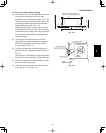
Remove the set screws and take off the rear panel.
(Fig. 1-30)
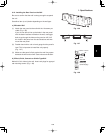
NOTE
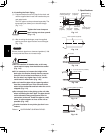
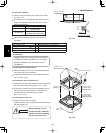
Tubing can be extended in 3 directions as shown in
Fig. 1-31. Select the direction that provides the shortest
run to the outside unit.
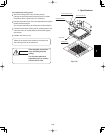
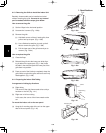
6-11. Selecting and Making a Hole
(1) Remove the rear panel from the indoor unit and
place it on the wall at the location selected. Make
sure the unit is horizontal using a level gauge or
tape measure to measure down from the ceiling.
(2) Determine which side of the unit you should make
the hole. (Fig. 1-32)
(3) Before making a hole, check carefully that no studs
or pipes are directly run behind the spot to be cut.
CAUTION
Also avoid areas where elec-
trical wiring or conduits are
located.
The above precautions are also applicable if tubing
goes through the wall in any other location.
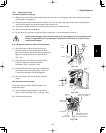
(4) Using a sabre saw, key hole saw or hole-cutting
drill attachment, cut a hole in the wall. See Table
1-6 and Fig. 1-33.
Table 1-6
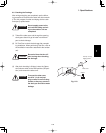
(5) Measure the thickness of the wall from the inside
edge to the outside edge and cut PVC pipe at a
slight angle 1/4" shorter than the thickness of the
wall. (Fig. 1-34)
(6) Place the plastic cover over the end of the pipe
(for indoor side only) and insert in the wall.
(Fig. 1-35)
Hole Dia. (inch)
3-3/16"
Set screws for transportation only
Fig. 1-30
Right-rear
tubing
(recommended)
Right tubing
Left-rear tubling
Fig. 1-31
Center of
left-rear
tubing hole
Center of
right-rear
tubing hole
In case of left-rear or right-rear tubing
Fig. 1-32
Indoor
side
Outdoo
r
side
Fig. 1-33
PVC pipe (locally purchased)
Cut at slight angle
Fig. 1-34
Plastic cover
(Field supply)
OUTSIDE
INSIDE
Wall
Slight
angle
PVC pipe
Fig. 1-35
NOTE
Hole should be made at a slight downward slant to
the outdoor side.
1