Commercial Pool Heaters
INSTALLATION
Continued
Ensure that the pump installed on the pool heater will supply
adequate flow to make the flow switch contacts and operate the pool
heater. A water flow switch meets most code requirements for a
low-water cut off device on appliances requiring forced circulation
for operation.
PUMP PURGE /
MAINTENANCE TIMER
OPTION
Pump Purge Delay Option
An electronic pump purge option is available for this pool heater.
During extended
periods of inactivity during which pumping may
have been turned off to conserve energy, air can become entrapped
in the piping. The pump purge option delays pool heater operation
until the pump has been on for sufficient time to remove air from
piping. Both the inactivity time and pump purging time are
adjustable.
The inactive timer is adjustable from 1 - 99 hours. Selection of a
time between 4 - 8 hours is recommended.
The purge timer is adjustable from 1 - 60 minutes. Selection of a
time between 10 to 30 minutes is recommended.
An override toggle switch is provided to turn off the pump purge
feature for testing or should the option no longer be desired. When
turned off, the call for heat will not be delayed.
Service Indicator Option
A service indicator option is available for this pool heater. The
Service Indicator light on the Diagnostic Information Panel will
light up indicating that the pre-programmed hours/cycles have
elapsed. Contact a qualified serviceperson to perform service on the
pool heater.
CONNECTING TO
ELECTRICAL SUPPLY
This pool heater is wired for 120 VAC service. The pool heater, when
installed, must be electrically grounded in accordance with the
requirements of the authority having jurisdiction or in the absence
of such requirements, with the latest edition of the National
Electrical Code ANSI/NFPA No. 70. When the pool heater is
installed in Canada, it must conform to the CAE C22.1, Canadian
Electrical Code, Part 1 and/or local Electrical Codes.
1. Use only Type-T wire [63°F (35°C) rise] on all wiring between
the pool heater and field-installed devices.
2. Enclose line voltage wire exterior to the pool heater in approved
conduit or approved metal-clad cable.
3. The pump must run continuously when the pool heater is being
fired.
4. To avoid serious damage, do not energize the pool heater until
the system is filled with water.
5. Provide the pool heater with the proper overload protection.
IMPORTANT: Do not block access to the electrical
cover plate when installing electrical conduit.
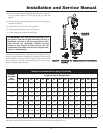
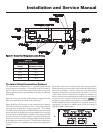
3-Way Automatic Bypass Valve Wiring
If the piping loop was disassembled for shipping or needs to be
fitted with an outdoor enclosure, connection or disconnection of
the 3-way automatic bypass valve will be required. Wiring
connections should be made to the appropriately numbered
terminals on the 3-way automatic bypass valve as follows:
- Yellow to terminal #1
- Blue to terminal #2
- White with a red stripe to terminal #3
- Pink to terminal #4.
Note:
Orientation of the valve connections may vary from what is
shown. Care should be taken to ensure wires are connected to the
appropriate terminals, see Figure 33 on page 32 of this manual.
ƽ WARNING: Power must be removed and the
clutch button must be depressed before
attempting to manually operate the valve or
damage to the 3-way valve may occur.
36


