


11
SECTION 2.0.
INSTALLATION
MODEL SOLU COMP II SECTION 2.0
INSTALLATION
2.1 UNPACKING AND INSPECTION
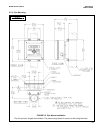
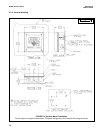
2.2 INSTALLATION
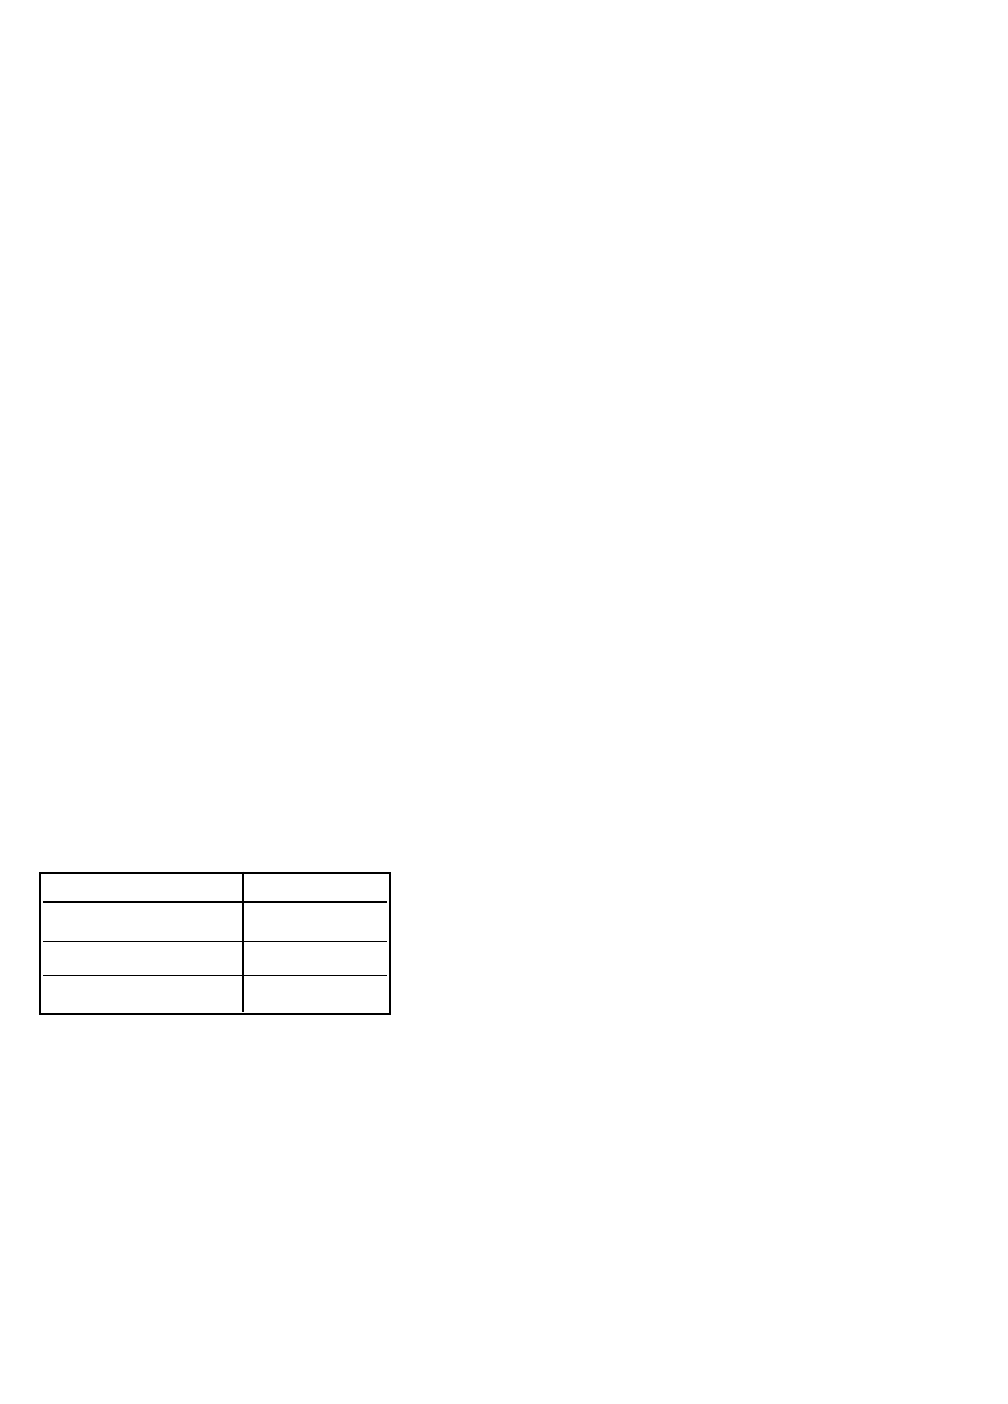
Type of Mounting Section
Panel 2.2.2
Pipe 2.2.3
Surface 2.2.4
2.1 UNPACKING AND INSPECTION
Inspect the shipping container. If it is damaged, contact the shipper immediately for instructions. Save the box. If
there is no apparent damage, unpack the container. Be sure all items shown on the packing list are present. If
items are missing, notify Rosemount Analytical immediately.
2.2 INSTALLATION
2.2.1 General Information
1. Although the analyzer is suitable for outdoor use, do not install it in direct sunlight or in areas of extreme tem-
peratures.
2. Install the analyzer in an area where vibrations and electromagnetic and radio frequency interference are min-
imized or absent.
3. Keep the analyzer and sensor wiring at least one foot from high voltage conductors. Be sure there is easy
access to the analyzer.
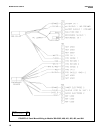
4. AC power and relay wiring should not enter via top conduit openings and should be kept separated
from other wiring in the analyzer after installation.
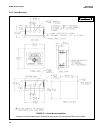
5. The analyzer is suitable for panel, pipe, or surface mounting. Refer to the table below.
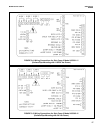
6. See Section 3.1 for removal of conduit knockouts.
7. To reduce the likelihood of stress on wiring connections, the hinged front panel (-11 models) shall not be
removed from the base during wiring installation, and there shall be sufficient wire leads to avoid stress on con-
ductors.
8. For UL-approved models (-68), the clear wiring shield must be installed prior to operation.