


Chapter 2 Preparation of Embroidery Machine
BES-962BC • BES-1262BC
31
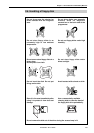
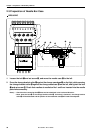
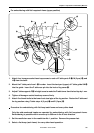
r
q
t
o
w
i
u
o
q
e
y
BES-1262BC
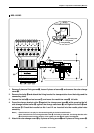
1. Remove 3 pieces of fixing screw q, loosen 2 pieces of screw w and remove the color change
cover e.
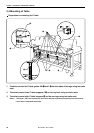
2. Remove the bolts r and detach the fixing bracket for transportation from the bridge and the
connecting shaft.
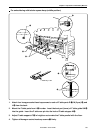
3. Loosen the bolts t and set screw !0, and move the needle bar case y left side.
4. Press the change bracket collar i against the change case base u, while pressing the left
side change bracket collar o against the change case base u, and tighten the bolts t and
set screw !0. Check that needle bar No.1 and 12 are inserted into the needle plate holes
smoothly.
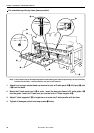
Notes) • Check that ther is no play for the connecting shaft in the horizontal direction.
• Never loose the bolt of the change bracket coller i. If this bolt is loosened, the change bracket coller
i will be dislocated and the position of the needle bar case y will need to be adjusted.
5. Attach the color change cover e by 3 pieces of fixing screw q and 2 pieces of fixing screw w.
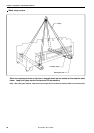
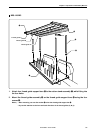
Bridge
Connecting shaft
Fixing bracket
Fixing bracket B