


D623 Series/D625 Series | User's Guide | Remote Arming with Telephone, Area 1
.
Bosch Security Systems | 9/04 | 46841E 31
Remote Arming with Telephone,
Area 1
I can perform this command.
I cannot perform this command.
This function controls the built-in telephone arming
feature for Area 1. When enabled, the control panel
answers the phone on the programmed ring count.
When the control panel answers the phone, it
• Sounds three beeps and starts the handshake tone
for remote programming if the control panel is All
or Part On.
• Sounds one short beep, waits approximately 3 sec.,
and then sounds one long beep if the control panel
is Off. Press and hold the [5] key* for 2 sec.
immediately after the first short arming beep and
before the long beep begins.
• Arms if it detects a [5] key press from the
telephone (All On with Delay, faulted points are
force-armed). The control panel sounds three
beeps (new armed state) and then hangs up.
* If arming from a cell phone, quickly press the [5] key three times. If
pressing and holding the [5] key for 2 sec. from a house (land line)
phone does not produce a tone long enough to arm Area 1, retry
by quickly pressing the [5] key three times.
Remotely disarming the control panel
cannot be done with a telephone.
View Log (Cmd 85)
I can perform this command.
I cannot perform this command.
Use this command to display system events, such as
alarm events, turning the system All On, Part On, and
Part 2 On, and turning the system off. Events are
displayed in reverse chronological order.
1. Press [CMD] [8] [5]. The keypad may prompt you
to enter a valid passcode.
2. Enter your passcode if necessary. The keypad
displays the event and user information and the
date and time of the event.
3. Press [*] to view to the next event.
4. Press [CMD] to exit this function and return to the
normal display.
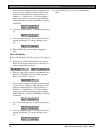
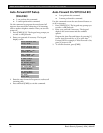
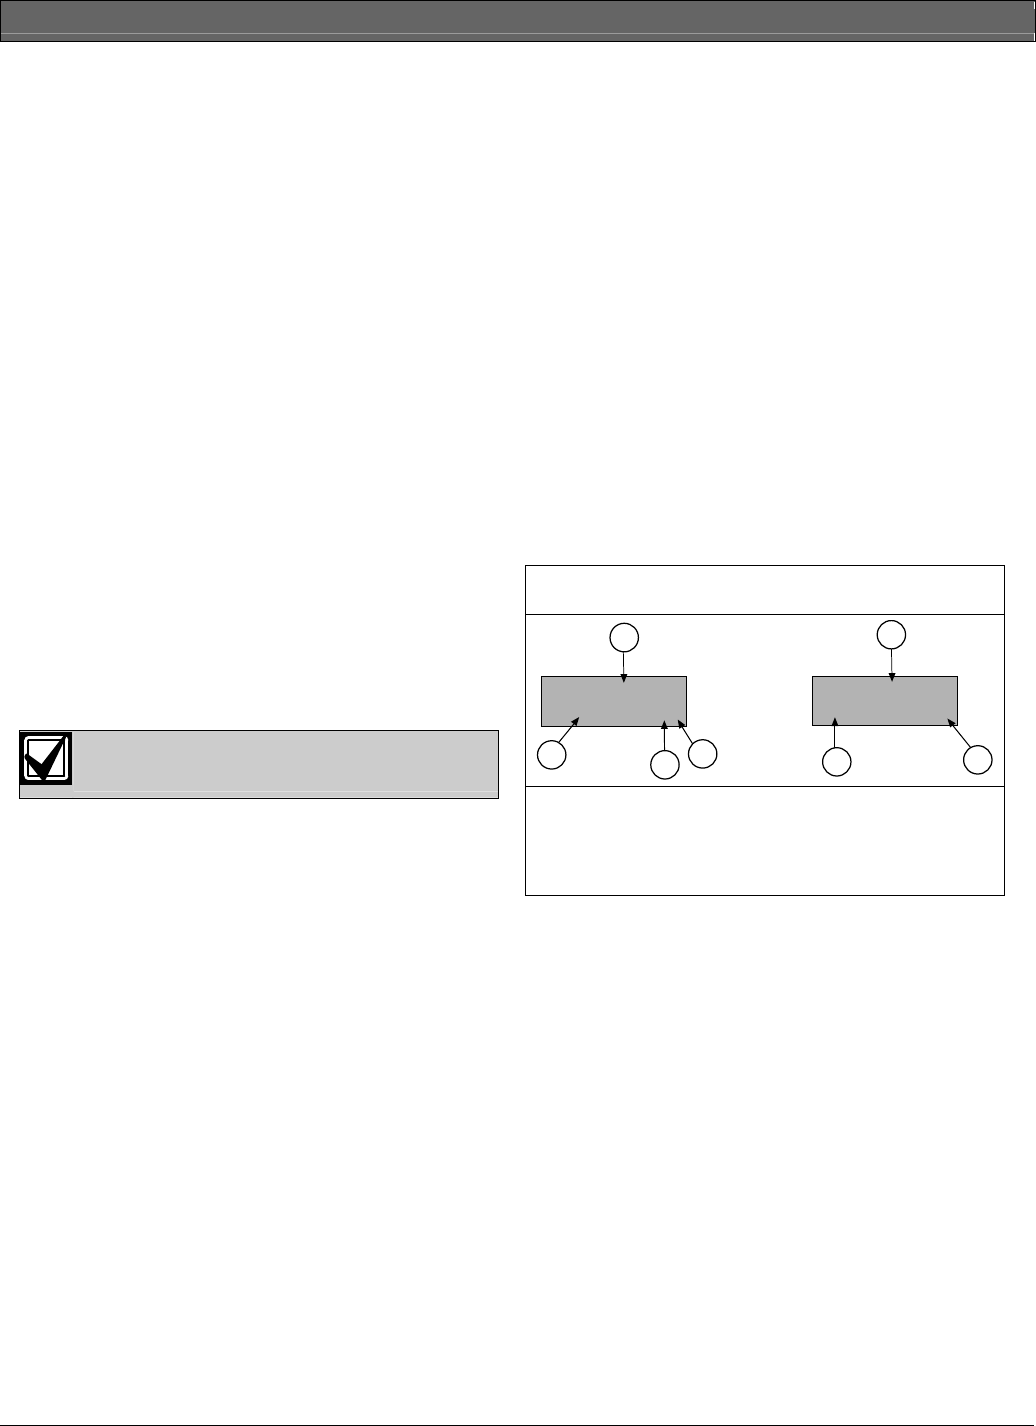
Figure 6 shows a sample log event entry as
displayed on the Text keypad:
Figure 6: Display layout
Sensor Mon Rstl
08:29 06/13/01
Sensor Mon Rstl
A1 Pt3 SL
3
4
5
6
1
1
2
1 - Event
2 - Event specific
information
3 - Destination 1
4 - Destination 2
5 - Time of event
6 - Date of event
The first line of the log shows the event
description. The second line of the log display
alternates between the time and date of the event
and the area, point (device), user and
communication information for the event. The
keypad displays time in a 24-hour format and the
date in a MM/DD/YY format.
The log displays the following characters to
communicate certain information: