1999 BERNINA Of America
Section E - page 14
CHAINSTITCH WITH DECORATIVE THREAD
Instruction Manual pg.
_____
•Convert the serger from Overlock to Cover Stitch using the directions on
page__ in the Instruction Manual or on the Quick Reference card. Insert the
Right Needle and turn the Stitch Selection Dial to “G”.
•Set Stitch Length at 3.
•Following the instructions on page ___ of your Instruction Manual, thread the
serger for a Chain Stitch threading the 3 Isacord thread colors through the
thread guide for the chain stitch (Lower) Looper on the Thread Guide Support.
Thread all three Isacord threads together through the Chain Stitch (Lower)
Looper Tension Disks and the Chain Stitch (Lower) Looper Thread Guides. Use
a floss threader to thread the 3-Threads through the Eye of the Looper.
•Slightly loosen (down) the tension on the Chain Stitch Looper.
•With stabilizer on top and the right side of the fabric against the Stitch
Plate place the fabric under the Needle and lower the Presser Foot. (You will
be stitching on the wrong side of the fabric with the stabilizer on top).
•Stitch a curved line across the fabric.
•Remove the fabric from under the Presser Foot and turn the fabric over to see
the decorative stitching.
•To see more of the decorative thread, increase Stitch Length. Changing Stitch
Length as you sew varies the decorative chain stitch effect. Remember to
always keep the Stitch Length at least 2.5mm long.
•Stitch several more curving lines across the fabric.
•Remove one spool of Isacord thread and rethread the serger using 2 spools
of Isacord and 1 spool of metallic thread.
•Slightly loosen (down) the tension on the Chain Stitch Looper.
•Sew several additional rows of Decorative Chain Stitching.
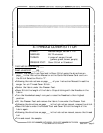
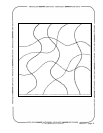
•Trim and mount the sample on the following page.
FABRIC: Medium weight cotton denim 6” X 6”
Tear Away Stabilizer 6x6”
NEEDLES: 80/12 universal
THREAD: 1 cone of serger thread
3 cones of Isacord
1 spool of Sulky or Madeira Metallic thread
PRESSER FOOT: Cover Stitch or Standard


