


1999 BERNINA of America
page 3
N
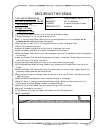
EEDLE STOP BUTTON
– Instruction Manual pg.___
• Needle Up - Overlock sewing
• Needle Down – Cover/Chain Stitch sewing
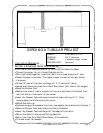
C
ONVERSION TO
O
VERLOCK SEWING
• Conversion Chart – Instruction Manual pg.___
• The Converter Arm
Use the Needle Stop Button to lower the Needles
• Removing the Cover/Chain Stitch Extension Plate – Instruction Manual pg.___
• Installing the Knife Guard – Instruction Manual pg.___
• Raising/Lowering the Knife Arm– Instruction Manual pg.___
• Rotating the Upper Knife into Cutting Position– Instruction Manual pg.___
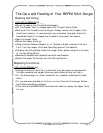
T
HREADING FOR
O
VERLOCK SERGING
• Cone Holders and Spool Caps – Instruction Manual pg.___
Cone Holders used for large cones of serger thread
Turn the Cone Holders upside down for the larger based cone threads.
Spool Caps used for “normal” sewing thread and decorative thread spools
• Raise the Presser Foot when threading
Releases the pressure on the tension disks
• The Threading Path – Instruction Manual pg.___
Use the road map inside the Looper Cover as a quick reference guide.
• Threading the First Thread Guide on All Threads – Instruction Manual pg.___
Wrap the thread from left to right to lock the thread into the guide.
• Threading Order
First – Upper Looper
This thread lies against the body of the serger.
Second – Lower Looper
Third – Center Needle
Fourth – Left Needle
• Thread the Upper Looper – Instruction Manual pg.___
• Thread the Lower Looper – Instruction Manual pg.___
The Lower Looper Auto Threader – Instruction Manual pg.___
Rotate the Handwheel to bring the Looper to the right before engaging
the Looper Threader
• Thread the Center Needle -– Instruction Manual pg.___
• The Needle Clamp Guide – Instruction Manual pg.___
• Optional - Using the Quick Needle Threader from a BERNINA sewing machine.
•
Thread the Left Needle – Instruction Manual pg.___